That reaction is not vanity. It is experience. You know exactly what happens when loose topsoil, a garden hose, a watering can operated by a six-year-old, and a play structure all coexist in the same unengineered space. The soil becomes mud. The mud migrates onto the play surface. The play surface tracks mud onto the patio. The patio tracks mud through the back door and onto the kitchen floor. Within a week, the pristine backyard you invested tens of thousands of dollars into looks like a construction staging area, and the garden is a waterlogged, root-rotted mess that is producing nothing except mosquitoes and frustration.
But here is the thing: the problem is not the garden. The problem is the engineering. Or rather, the absence of it. A children's garden zone absolutely can coexist with a luxury play area and a premium hardscape patio —but only if the soil is contained, the water is managed, the zones are structurally separated, and the materials are permanent. Do those four things correctly, and the garden becomes a beautiful, functional feature that teaches your children about nature while enhancing the overall aesthetic of the yard rather than destroying it.
This guide covers the full engineering reality of integrating a gardening zone into a children's play area on residential properties in Etobicoke and across the GTA—what needs to happen underground, what materials actually work, and why the typical DIY garden bed is the single fastest way to ruin a luxury backyard.
The Muddy Collision: Why Unengineered Gardens Destroy Backyards
Let us be specific about the failure sequence, because understanding how the mud gets everywhere is the key to understanding how to prevent it.
A ground-level garden bed is, from an engineering perspective, a concentrated water application zone surrounded by surfaces that are highly sensitive to moisture and particulate contamination. The garden soil is loose by design—plants need loose, aerated soil to root. That loose soil is regularly saturated with water from irrigation (hose, watering can, sprinkler, rain). When loose, saturated soil is adjacent to a play surface (turf, rubber, mulch) or a patio (pavers, concrete), three contamination pathways activate simultaneously:
Pathway 1: Splash migration. Water hitting exposed soil at any velocity—from a hose, a watering can, a downpour, even irrigation overspray—ejects soil particles into the air. These particles land on the adjacent play surface and patio, depositing a fine film of mud with every watering event. Over a growing season, the cumulative deposit darkens paver surfaces, stains polymeric sand joints, and embeds in the texture of artificial turf.
Pathway 2: Foot tracking. Children do not observe zone boundaries. They step from the garden into the play area and back a hundred times per afternoon, carrying wet soil on their shoes and bare feet. The play surface becomes a secondary mud deposit zone. The patio becomes a tertiary deposit zone. The house becomes the final destination.
Pathway 3: Sheet flow. Excess irrigation water and rainfall that the garden soil cannot absorb flows laterally across the surface, carrying dissolved soil particles with it. If the garden bed is at the same grade as the adjacent play surface or patio (which it always is in an unengineered installation), the muddy water sheets directly across the clean surface, leaving a sediment trail that dries into a crust.
All three pathways share a root cause: the soil and the clean surfaces are at the same elevation with no physical barrier between them. The solution, therefore, is to elevate the soil, contain it in a structure, and engineer the drainage so that every drop of water leaving the garden goes down through a controlled drainage system rather than out across the adjacent surfaces.
The Engineering: Structural Planters with Internal Drainage
The correct way to build a children's garden zone adjacent to a play area is with raised structural masonry planters—permanent, heavy civil structures that contain the growing medium, manage the water, and create an absolute physical separation between the biological zone and the clean hardscape zone.
Why Masonry, Not Wood
The default DIY garden bed is a wooden frame—cedar boards, pressure-treated lumber, or railway ties stacked on the ground and filled with soil. On an Etobicoke property where the garden is miles from any hardscaping, wood frames work adequately for a few years. But adjacent to a luxury play area and patio, wood frames fail on every metric that matters:
Structural lifespan. Cedar raised beds last 5 to 8 years in Ontario's climate before the wood softens, warps, and begins to decompose. Pressure-treated lumber lasts 10 to 15 years but still deteriorates, splitting at the fastener points and bowing outward under soil pressure. When the frame fails, the contained soil spills onto the adjacent surface. You are back to the mud problem, except now you also have a demolished garden to clean up and rebuild.
Chemical concerns. Modern pressure-treated lumber uses ACQ (Alkaline Copper Quaternary) preservatives, which are significantly safer than the arsenic-based CCA treatments of the past. However, ACQ-treated wood leaches copper into the surrounding soil over time. While the levels are generally considered safe for vegetable gardening by Health Canada, the visible green-tinged copper staining that weeps from cut ends and fastener holes onto adjacent pavers and artificial turf is a permanent aesthetic problem that cannot be removed without replacing the stained material. For families specifically building a garden to teach children about growing food, many prefer to eliminate any chemical treatment from the equation entirely.
Aesthetic integration. A wooden box sitting on top of a premium paver patio looks like exactly what it is: a temporary, unfinished afterthought. It does not match the hardscape material palette. It is not architecturally integrated. It announces that this part of the yard was not designed; it was added later by someone with a circular saw and a trip to the lumber yard.
The Structural Masonry Planter: Permanent, Clean, and Beautiful
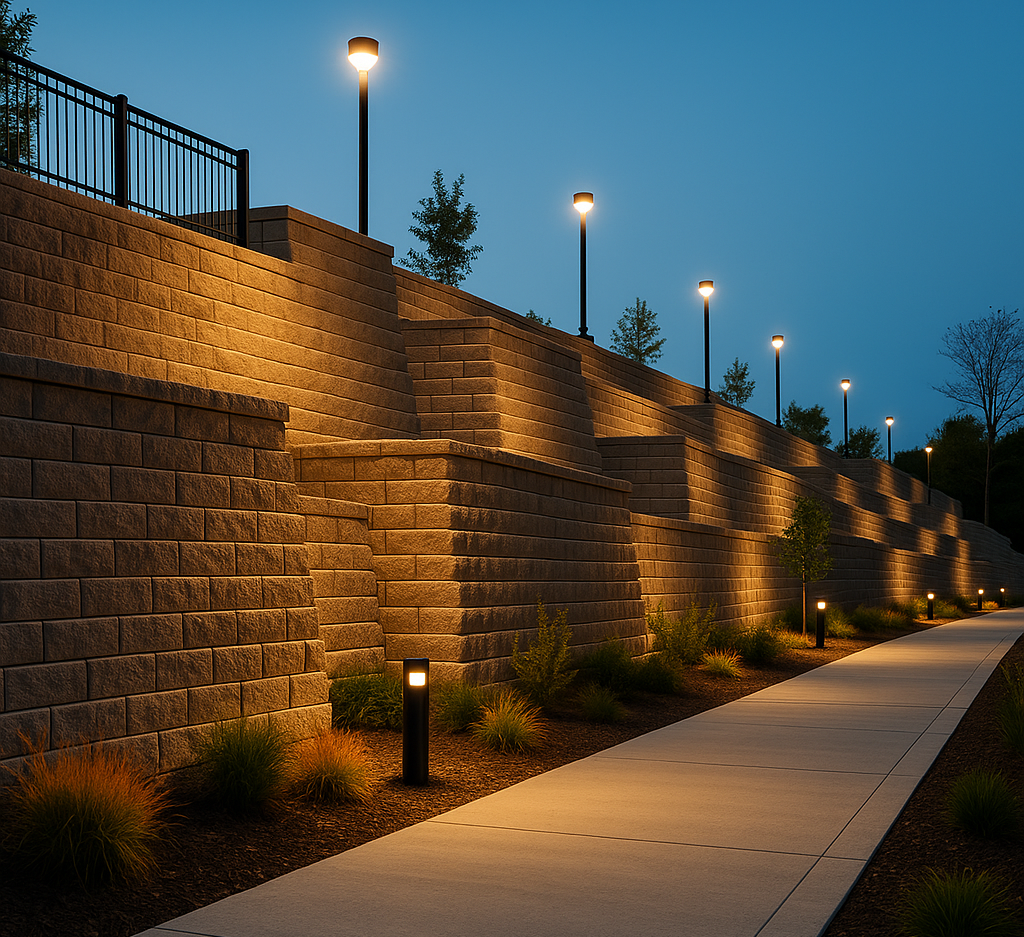
A structural masonry planter is built with the same segmental retaining wall blocks or architectural concrete blocks used for retaining walls, seating walls, and other permanent hardscape features throughout the property. On the properties we build in Etobicoke, planters are typically constructed from deep Charcoal segmental units that match the retaining walls, seat walls, and zone separators elsewhere in the yard, creating a unified material vocabulary across the entire backyard.
The planter is built on a compacted granular footing—a 150mm to 200mm bed of compacted Granular A or clear stone, depending on the site drainage conditions—that provides a stable, frost-resistant base. The footing sits below the frost line depth for the Etobicoke area (approximately 1.2 metres, though the footing itself does not need to reach that depth for a low planter—the granular material provides drainage that prevents frost heave by eliminating water accumulation at the base). The block courses are stacked with construction adhesive between courses, creating a structure that is dimensionally stable, permanently level, and impervious to the soil pressure inside it.
Internal Engineering: The Drainage System Inside the Planter
The most critical engineering element of a structural planter is invisible from the outside: the internal drainage system that manages excess water from irrigation and rainfall without allowing it to contact the surrounding hardscape.
Step 1: Geotextile liner. The interior walls and floor of the planter are lined with commercial-grade non-woven geotextile fabric. This fabric serves as a soil migration barrier— it allows water to pass through freely but prevents soil particles from escaping through any gap between the masonry blocks. Even microscopic gaps that would be invisible from the outside can, over years, allow fine soil particles to migrate through the wall if the interior is not lined. The geotextile eliminates this pathway entirely.
Step 2: Drainage aggregate layer. Before any growing medium is placed, a 100mm to 150mm (4 to 6 inch) layer of 19mm clear stone (washed aggregate) is placed at the bottom of the planter. This clear stone layer creates a drainage reservoir that collects excess water from the soil above and holds it below the root zone. The clear stone is free-draining—there are no fines to retain water—so the reservoir empties through the weep holes (see next step) within hours of a watering event.
Step 3: Weep holes. The lowest course of the planter wall has weep holes—small openings (typically 25mm to 50mm in diameter) spaced every 300mm to 450mm (12 to 18 inches) around the perimeter —that allow water to drain out of the clear stone reservoir and into the sub-base beneath the adjacent hardscape, not onto the surface of it. This is the critical distinction that separates an engineered planter from a leaking box. The weep holes are positioned at or below the level of the adjacent paver sub-base, so water exits the planter into the granular drainage layer beneath the pavers or play surface, where it disperses harmlessly into the native sub-grade. The water never touches the visible surface. No mud. No puddles. No staining.
Step 4: Separation fabric over drainage layer. A second layer of geotextile fabric is placed over the clear stone drainage reservoir, beneath the growing medium. This prevents the fine organic soil from migrating downward into the clear stone and clogging the drainage over time. The growing medium sits on the fabric, the fabric sits on the stone, and the stone sits on the planter floor. Three layers, three functions, zero contamination between zones.
Step 5: Growing medium. The planter is filled with a premium triple-screened garden blend—typically a mixture of 60% screened topsoil, 30% compost, and 10% peat or perlite by volume— that provides ideal fertility, moisture retention, and aeration for fruits, vegetables, herbs, and flowers. The growing medium is filled to approximately 50mm (2 inches) below the top of the planter wall to prevent splash-over during watering and to contain any surface mulch placed on top.
Zoning: The Physical Barrier Between Biology and Play
Even with perfectly engineered internal drainage, the garden planter must be structurally separated from the active play zone. Children do not respect invisible boundaries. They will step from the garden into the play area with muddy hands and dirty tools every single time unless there is a physical barrier that makes the transition difficult enough to pause, assess, and wipe off.
The Zone Layout
The optimal layout for a combined play and garden zone on an urban Etobicoke lot positions three distinct zones in a linear sequence:
Zone 1: The Adult Patio. An expansive Warm Off-White interlocking paver entertaining and dining surface. This is the clean zone—no soil, no play equipment, no compromises. Parents supervise from here. Adults entertain here. It is the visual anchor of the backyard.
Zone 2: The Play Surface. Playground-grade artificial turf or engineered wood fibre on a compacted clear stone sub-base. This is the active zone—swings, climbing, running, impact. It is separated from the patio by a low deep Charcoal segmental retaining wall (12 to 18 inches) that contains the play surface material, provides informal seating for supervising parents, and stops soccer balls from rolling onto the patio.
Zone 3: The Garden. Raised structural masonry planters in the same deep Charcoal block, positioned at the far end or along the side boundary of the play zone. The planters are directly adjacent to the play surface but elevated above it—their walls rise 15 to 24 inches above the play surface grade, creating an unmistakable physical boundary between the dirt zone and the clean zone.
This three-zone layout creates a gradient of messiness that moves away from the house. The cleanest surface (pavers) is closest to the back door. The moderately active surface (play turf) is in the middle. The dirtiest element (garden soil) is the farthest from the house and the most structurally contained. Mud cannot travel from Zone 3 to Zone 1 without crossing Zone 2 and climbing over a wall. The physical layout makes contamination difficult by design—not by relying on children to remember rules.
The Wall as Feature, Not Just Barrier
The retaining walls and planter walls are not utilitarian structures hidden at the back of the yard. They are architectural features that unify the entire composition. When the Zone 1-to-Zone 2 separation wall, the Zone 2-to-Zone 3 planter walls, and any perimeter seat walls are all built from the same deep Charcoal segmental block, the yard reads as a single, cohesive design with three distinct functional areas—not as three separate projects bolted together.
The colour interplay is deliberate and powerful. The Warm Off-White paver field in Zone 1 provides a clean, luminous base. The deep Charcoal walls provide bold, architectural structure. The vibrant green artificial turf in Zone 2 brings a living, natural texture. And the rich earth tones of the garden soil and plant material in Zone 3 introduce organic warmth. Four textures, four tones, three functions, one material language. It reads as luxury because it is luxury—every element was chosen, positioned, and built with intention.
"A garden that looks like it was designed by the same firm that built the patio is an asset. A garden that looks like it was added by someone who tripped over a bag of soil is a liability. The engineering is the difference."
Plant Selection for the Engineered Garden Zone
The structural planter is designed to support any plant material appropriate for Ontario's growing zone (Zone 5b/6a in Etobicoke). However, in a children's garden context, plant selection must account for three additional factors beyond standard horticulture:
Safety. No toxic or irritant species. This eliminates a surprising number of common ornamentals: foxglove, oleander, lily of the valley, monkshood, and many others are toxic if ingested. In a children's garden, every plant in the bed must be safe if a curious child puts a leaf or berry in their mouth. Tomatoes, strawberries, herbs (basil, mint, parsley, chives), lettuce, peas, sunflowers, and marigolds are all excellent choices—edible, non-toxic, fast-growing, and engaging for young gardeners.
Engagement. Children garden for results. They want to see something happen quickly. Plants that germinate fast (peas, beans, lettuce), produce visible fruit (tomatoes, strawberries, peppers), or grow dramatically (sunflowers, pumpkin vines) hold a child's attention far better than slow-growing perennials that do not visibly change from week to week.
Containment. Some plants are aggressive spreaders that will escape a planter and colonise the adjacent surfaces if not managed. Mint is the classic offender—plant it in the ground and it will invade every surface within reach. In a structural planter with geotextile lining and no soil connection to the surrounding grade, spreading is physically impossible. The planter walls contain the root system completely. This is another structural advantage of masonry planters over ground-level beds: the plants stay where you put them.
The Lifecycle: Garden Today, Something Else Tomorrow
One of the most significant advantages of a structural masonry planter over a wooden raised bed or a ground-level garden is permanence and adaptability. The masonry structure will outlast the plants, the children's interest, and potentially the homeowner's tenure on the property.
When the children outgrow the garden, the planter does not get torn out. It transitions. The vegetable garden becomes a perennial flower display. Or a herb garden for the outdoor kitchen. Or a succulent arrangement. Or it is filled with ornamental grasses that complement the patio aesthetic year-round. The structure supports any planting scheme because the drainage, containment, and soil volume are engineered for the worst case—heavy watering, loose soil, high organic content—so any future use is within the design envelope.
The retaining wall that separated the play zone from the garden zone becomes a seat wall beside a fire pit. Or a visual border for a meditation garden. Or a backdrop for landscape lighting. The structure is permanent. The function evolves. Nothing gets demolished. Nothing gets wasted. The investment in heavy civil masonry pays dividends for the entire life of the property.
The Cinintiriks Approach: Engineered Family Zones, Not Rotting Garden Boxes
At Cinintiriks, we do not build temporary wooden garden frames. We engineer permanent, masonry-integrated family environments. Our Cinintiriks Standard for Integrated Garden and Play Zones treats the garden planter as a fully engineered hardscaping feature that is designed, built, and guaranteed with the same rigour as every retaining wall, patio, and drainage system on the property:
1. Unified Design: The garden planter is designed as part of the overall site plan, not added as an afterthought. Its dimensions, position, height, and material are determined in the context of the play zone, the patio, the drainage plan, and the overall property circulation. Every element uses the same material palette—Warm Off-White pavers, deep Charcoal segmental walls—so the garden reads as a designed feature, not an improvisation.
2. Heavy Civil Foundation: The planter is built on a compacted granular footing with a minimum 150mm depth. The footing extends 200mm beyond the planter wall on all sides for stability. On Etobicoke properties with clay-heavy sub-grade, the footing includes non-woven geotextile beneath the granular layer to prevent clay heave from destabilising the structure.
3. Internal Drainage Engineering: The planter interior is lined with commercial geotextile. A 100mm to 150mm clear stone drainage reservoir is installed at the base. Weep holes at 300mm spacing in the lowest block course discharge excess water into the sub-base beneath the adjacent play surface or paver field—never onto the visible surface. A separation fabric between the drainage layer and the growing medium prevents fine soil from clogging the stone over time.
4. Structural Zone Separation: The planter wall itself serves as the physical barrier between garden zone and play zone. At 15 to 24 inches in height, it is tall enough to contain soil, stop stray balls, and prevent casual cross-zone foot traffic, while low enough for children to lean over and tend their plants comfortably. The wall cap is finished with a smooth, flat coping stone that provides a clean sitting surface for parents supervising garden activities.
5. Premium Growing Medium: The planter is filled with a custom garden blend (60% triple-screened topsoil, 30% aged compost, 10% perlite) that provides ideal fertility and drainage for the Ontario growing season. The soil level is set 50mm below the planter rim to prevent splash-over. A 25mm layer of cedar mulch tops the soil to retain moisture, suppress weeds, and give the planter a clean, finished appearance.
Don't let an unengineered garden turn your luxury play area into a mud pit. Contact Cinintiriks to design and build heavily engineered, structurally separated family zones in Etobicoke.
FAQ: Gardening Zones in Children's Play Areas
Why are structural concrete planter boxes safer for a children's garden than pressure-treated wood?
For three specific reasons that compound over the life of the installation. First, chemical exposure. Pressure-treated lumber treated with ACQ (Alkaline Copper Quaternary) leaches copper compounds into the surrounding soil over time. While Health Canada considers the copper levels in modern pressure-treated wood generally safe for proximity to edible gardens, the concern is higher for children's gardens specifically because children handle soil more aggressively (digging with bare hands, touching their faces), and the exposure frequency is higher. Structural concrete or masonry block is chemically inert—it does not leach any compounds into the soil. There is zero chemical interaction between the container and the growing medium, eliminating the concern entirely. Second, structural integrity over time. Wooden frames deteriorate in Ontario's climate. The cycle of freeze-thaw, UV exposure, and constant soil moisture softens wood fibres, loosens fasteners, and eventually causes the frame to bow, split, or collapse. When a wooden frame fails, it releases its contained soil onto the adjacent surface—pavers, artificial turf, or lawn—creating an acute contamination event and a tripping hazard. Masonry planters do not deteriorate. The concrete block is rated for below-grade exposure and freeze-thaw cycling indefinitely. The structure is as sound at year 25 as it was at year one. Third, physical hazards. Deteriorating wood develops splinters, exposed nails and screws, and sharp split edges that are dangerous for children who lean on, sit on, or climb over the garden frame. Masonry block with a finished cap has no splinters, no fasteners, and no sharp edges. The cap surface is smooth and consistent, safe for sitting, leaning, and the inevitable climbing.
How do you ensure water draining from a raised garden bed doesn't flood the adjacent play surface?
Through a three-layer internal drainage system that directs all excess water downward into the sub-base rather than outward onto the surface. The system works as follows: the bottom of the planter contains a 100mm to 150mm layer of 19mm clear stone (washed aggregate with no fines) that acts as a drainage reservoir. When the garden soil above is watered, excess moisture percolates down through a geotextile separation fabric (which prevents soil particles from entering the stone) and collects in the clear stone layer. The lowest course of the planter wall has weep holes spaced every 300mm to 450mm—small openings that allow water to exit the planter at the sub-base level, not the surface level. The water flows from the clear stone reservoir, through the weep holes, and into the granular sub-base beneath the adjacent play surface or patio. Because the weep holes discharge below the finished surface grade, the water enters the drainage layer that is already engineered to handle stormwater from the play surface and patio above. It disperses into the native sub-grade through the same clear stone drainage system that manages rainfall on the rest of the property. No water touches the visible surface. No mud escapes. The play surface and patio remain completely dry and uncontaminated by any drainage from the garden planter. The entire interior of the planter is also lined with non-woven geotextile, which prevents any soil particles from escaping through hairline gaps between masonry blocks. Even if a joint between blocks were to open slightly over decades of thermal cycling, the geotextile layer ensures that only clean water exits the structure—never soil.
What is the ideal height for a raised masonry planter to double as seating for a play area?
The ideal dual-purpose height is 18 to 20 inches (450mm to 500mm) above the adjacent finished grade. This height is arrived at by balancing three competing requirements. For seating comfort: standard bench and seat wall height is 15 to 18 inches (380mm to 450mm), which corresponds to the average adult knee-to-floor distance and provides a comfortable sitting position with feet flat on the ground. Going slightly higher to 18 to 20 inches accommodates the planter cap width (which is wider than a typical seat wall cap, at 300mm to 400mm) and ensures the sitting surface is at a comfortable height rather than uncomfortably low. For gardening ergonomics: 18 to 20 inches brings the soil surface to a height where young children (ages 4 to 10) can lean over the wall comfortably, reach into the planter with both hands, and work the soil without straining. Much taller than 24 inches and smaller children cannot reach the far side of the planter. Much shorter than 15 inches and the planter loses its effectiveness as a barrier and a seating surface. For soil volume: an 18 to 20 inch planter wall with a 4 to 6 inch clear stone drainage layer at the bottom provides approximately 12 to 16 inches (300mm to 400mm) of growing medium depth. This is more than sufficient for virtually all vegetables, herbs, flowers, and small fruits that children typically grow—including tomatoes, peppers, and strawberries, which require a minimum of 8 to 12 inches of root depth. The planter provides ample soil volume without requiring an excessively tall wall that would block sightlines and feel imposing in a compact Etobicoke backyard. The cap on top of the 18 to 20 inch wall should be a smooth, flat coping stone (concrete or natural stone) that extends 25mm to 50mm beyond the face of the wall on the seating side, providing a comfortable overhang for sitting and a clean drip edge that keeps water off the wall face.
The Final Word
A children's garden zone is one of the most rewarding features you can add to a family backyard. It teaches patience, responsibility, and a connection to the natural world that screens cannot provide. But it must be engineered, not improvised. Loose dirt dumped next to a play structure is a mud factory. A structural masonry planter with internal drainage, geotextile containment, and proper zoning is a permanent, beautiful, mud-free growing space that enhances the yard instead of destroying it.
Build the garden the same way you built the patio: with permanent materials, correct engineering, and a design that will look as good in ten years as it does today. The children will outgrow the tomatoes. The planter will not outgrow the yard.