The Gravity Liability
This is not a rare occurrence. It happens across the GTA every spring and every fall, during peak sod installation seasons, on properties with steep grade changes that were sodded by contractors who either did not understand slope mechanics or chose to ignore them. The homeowner is told the sod will root in and hold itself. The contractor unrolls the turf, runs the irrigation, collects the payment, and leaves. Three weeks later, the call comes: the sod is separating. Gaps are opening between rolls. The bottom edge is buckling. And then, after the next significant rainfall, the entire installation lets go.
The problem is not the sod. The sod is doing exactly what sod does: lying on the surface, waiting for its roots to grow into the soil below. The problem is that on a steep slope, the sod does not have the time it needs to root before gravity and water dictate the outcome. On a flat surface, the sod sits in place by friction alone, and two to three weeks of consistent moisture is all the root system needs to knit into the topsoil. On a steep slope, friction is dramatically reduced by the incline angle, and every watering event reduces it further. The sod is in a race against gravity, and on anything steeper than about 20 degrees, gravity wins.
The question, then, is not simply whether you can install sod on a steep slope. You can. But the methods required to make it succeed range from labour-intensive erosion control engineering to a complete rethinking of the slope itself through structural terracing. The right approach depends on the steepness, the soil conditions, the scale of the slope, and—critically—your long-term intentions for the space.
The Engineering: Making Sod Hold on a Slope
If the slope must remain a slope—if terracing is not feasible or desired—then the sod installation must be engineered to counteract the forces that cause failure. This is not an advanced technique. But it is a technique that requires specific materials, specific methods, and an understanding of why each element matters.
Step 1: Soil Preparation and Erosion Control Blanket
Before any sod is laid, the slope surface must be prepared to maximise the sod's ability to root and to minimise the erosion that occurs during the vulnerable establishment period.
The topsoil layer on the slope is loosened to a depth of 75 to 100 millimetres using a rake or light tilling, creating a textured surface that the sod's roots can penetrate more easily than compacted, smooth clay. If the existing soil is heavy clay with poor organic content (which is common across Woodbridge and the Vaughan corridor), a thin layer of topsoil or compost may be incorporated to improve the root environment. The surface is then lightly rolled to establish firm contact without re-compacting it into a slick, impenetrable plane.
On slopes exceeding approximately 15 degrees (a 3:1 grade or steeper), a commercial-grade biodegradable erosion control blanket (ECB) is installed over the prepared soil before the sod is laid. ECBs are typically woven from coconut coir fibre, straw, or a blend of both, stitched between two layers of photodegradable polypropylene netting. The blanket is unrolled down the slope (not across it), starting at the top and overlapping each successive strip by a minimum of 100 millimetres. The top edge is buried in a shallow trench (approximately 150 mm deep) at the crest of the slope and backfilled to anchor it securely.
The ECB serves two critical functions. First, it provides immediate erosion protection for the soil surface during the establishment period. If a heavy rainstorm occurs before the sod has rooted, the blanket prevents the surface water from stripping topsoil from beneath the turf, which is the primary mechanism that creates the shear plane for sliding. Second, the fibrous matrix of the blanket provides a mechanical substrate for the sod's roots to grip as they grow downward. The roots penetrate through the blanket and into the soil, and the blanket itself acts as a reinforcing layer that binds the sod to the slope during the critical first weeks. Over the following 12 to 24 months, the biodegradable blanket decomposes naturally, leaving only the fully rooted turf anchored directly to the soil.
Step 2: Horizontal Installation Pattern
On flat surfaces, sod can be laid in any direction—the orientation is irrelevant when gravity is not a factor. On a slope, the installation direction is critical.
Sod on a slope must be installed in horizontal rows, perpendicular to the fall line, working from the bottom of the slope upward. Each row runs across the slope in a continuous strip, with the long edge of the sod parallel to the contour of the hill. The joints between rows are staggered (like brickwork) so that no vertical seam runs continuously down the slope, which would create a channel for water to concentrate and erode the soil beneath.
Starting at the bottom is deliberate: each subsequent row is laid overlapping the top edge of the row below it by approximately 25 to 50 millimetres. This overlap sheds water over the face of the sod below rather than allowing it to penetrate the seam and lubricate the interface. The result is a shingled surface that manages water flow in the same way a tiled roof does.
Step 3: Structural Staking
This is the element that separates a professional slope installation from a failure waiting to happen. Every single roll of sod on a steep slope must be physically pinned to the earth with structural stakes.
The stakes are typically heavy-duty biodegradable wooden pegs (200 to 250 mm long, 15 to 20 mm diameter), or on extremely steep or high-risk slopes, galvanised steel U-pins (150 to 200 mm long, 3 mm gauge). The stakes are driven through the sod and the erosion control blanket beneath it, deep into the undisturbed subsoil below, at a density of approximately one stake per 300 to 400 square millimetres—roughly 6 to 8 stakes per square metre. On a 100-square-metre slope, this translates to 600 to 800 individual stakes, each one driven by hand or with a rubber mallet.
The stakes serve as temporary anchorage. They physically pin the sod in position against the gravitational shear force until the root system has developed sufficiently to self-anchor—typically 14 to 21 days in warm, moist conditions. Without staking, even a perfectly installed sod surface on a 20-degree slope will begin to creep downhill within days, particularly when saturated by irrigation or rain. With proper staking, the sod is held rigidly in place, the roots grow undisturbed, and the transition from mechanical anchorage (stakes) to biological anchorage (roots) occurs seamlessly.
Wooden stakes decompose in the soil over 6 to 12 months, leaving no trace. Steel U-pins remain permanently but are driven below the mowing surface and pose no interference with maintenance.
Step 4: Irrigation Architecture
Irrigating sod on a slope is a paradox: the sod needs consistent moisture to root, but every drop of water applied to the surface wants to run downhill rather than soak in. On flat ground, a sprinkler delivers water uniformly and it percolates vertically into the soil. On a slope, the water hits the surface and immediately begins flowing downhill, concentrating in low channels, eroding exposed seams, and saturating the bottom of the slope while leaving the top dry.
The solution is short-cycle, high-frequency irrigation. Rather than running the sprinklers for a single long cycle (which delivers more water than the slope can absorb before runoff begins), we program the irrigation controller for multiple short cycles of 5 to 8 minutes each, spaced 30 to 60 minutes apart. Each short cycle delivers a small volume of water that the soil can absorb before gravity pulls it downhill. Three or four short cycles throughout the morning deliver the same total volume as a single long cycle, but without the runoff and erosion.
On slopes in Woodbridge where automatic irrigation is not installed, manual watering with a gentle, fan-shaped nozzle (not a concentrated stream) achieves the same result. The key is patience: apply a little, wait for it to absorb, apply a little more. Never flood the surface.
"A slope does not fight you because you chose the wrong grass. It fights you because you ignored the physics beneath it."
The Reality Check: When Sod on a Slope Is the Wrong Answer
Everything described above—erosion control blankets, horizontal installation, structural staking, cycle-and-soak irrigation—is the correct engineering for moderate slopes, typically between 15 and 25 degrees (3:1 to approximately 2:1 grade). For these slopes, sod can be installed successfully with proper technique, and once established, it provides effective erosion control and a clean, maintained appearance.
But there is a threshold beyond which sod is no longer a practical or advisable surface treatment, regardless of how well it is engineered. That threshold is approximately 25 to 30 degrees (a 2:1 grade), and beyond it, the calculus changes fundamentally.
On slopes steeper than 30 degrees, the gravitational shear force on saturated sod exceeds the frictional resistance of any staking system during sustained heavy rain. The erosion control blanket helps, but it cannot overcome the physics of a near-vertical embankment shedding water at catastrophic volumes. Even if the sod survives the establishment period, maintaining it becomes dangerous. Mowing a slope steeper than 25 degrees with a walk-behind mower is a serious safety hazard. Riding mowers cannot operate above approximately 15 degrees without rollover risk. Push mowers lose traction on wet grass at these angles and can slide out from under the operator.
And then there is the aesthetic reality. A steep grass slope, even when successfully established, is visually monotonous. It is a wall of green that cannot be used, cannot be walked on comfortably, cannot be furnished, and cannot be enjoyed as a functional outdoor space. It is a large, expensive area of your property that serves no purpose other than holding the soil in place.
For these reasons, on slopes exceeding 25 degrees, we consistently recommend a different approach entirely.
The Luxury Alternative: Structural Terracing
Structural terracing does not fight the slope. It eliminates it. Instead of trying to lay a continuous surface on an incline that wants to shed everything placed on it, terracing breaks the slope into a series of flat, usable platforms separated by structural retaining walls. Each terrace is level. Each terrace can receive sod, pavers, planting beds, or any combination of surface treatment without any of the gravitational liabilities of an inclined surface.
How Structural Terracing Works
A terraced slope is, in engineering terms, a series of gravity retaining walls—structural elements that resist the lateral earth pressure of the retained soil behind them using their own mass and the mechanical interlock of the wall units. Each wall holds back a defined height of earth, creating a flat terrace behind it. The next wall sits behind and above the first, holding back the next section of slope. The result is a staircase of level platforms carved into the hillside.
The retaining walls themselves are built from segmental retaining wall blocks—engineered, interlocking concrete units (typically 200 to 400 mm deep, 150 to 200 mm high) that stack and interlock without mortar. The blocks are placed on a compacted Granular A levelling pad and built up course by course, with each course setback (battered) slightly from the one below to direct the weight of the wall into the earth behind it. The interlock between courses is achieved through a combination of the block geometry (lips, pins, or integrated keying systems) and the mass of the aggregate backfill.
Behind each wall, the space between the wall face and the excavated slope face is backfilled with clear stone aggregate —free-draining, void-rich material that allows water to percolate downward rather than building up hydrostatic pressure behind the wall. A perforated drainage pipe is laid at the base of the clear stone backfill zone, collecting water and directing it to a daylight point or a connected drain. This drainage system is non-negotiable: hydrostatic pressure from trapped water behind a retaining wall is the single most common cause of wall failure. The wall is designed to resist earth pressure, not water pressure.
A non-woven geotextile fabric separates the clear stone backfill from the native soil, preventing fine particles from migrating into the drainage aggregate and clogging the void structure over time.
Engineering Requirements for Wall Height
Retaining walls are engineered differently based on their height. In Ontario, walls below 1.0 metre in exposed height are generally classified as landscape walls and can be built to manufacturer specifications without a formal engineering review. Walls between 1.0 and 1.5 metres typically require adherence to the block manufacturer's engineered design guidelines, including specifications for base preparation, backfill, and geogrid reinforcement. Walls exceeding 1.5 metres require a stamped engineering design from a licensed Professional Engineer (P.Eng.), incorporating soil analysis, surcharge loading calculations, global stability analysis, and specified geogrid reinforcement layers.
For a steep ravine lot in Woodbridge with a total grade change of 3 to 5 metres, the terracing solution may involve three or four retaining walls, each 0.8 to 1.2 metres in height, with level terraces of 2 to 4 metres between them. By keeping each individual wall below the engineering threshold, we can often deliver a complete terracing system within manufacturer design guidelines, avoiding the cost and timeline of a custom engineering report while still achieving full structural compliance.
The Terraces as Functional Space
This is where the transformation becomes extraordinary. A steep slope is useless space. A series of level terraces is a multi-level outdoor living environment.
The top terrace, adjacent to the house, receives an expansive patio finished in our signature Warm Off-White interlocking pavers—a dining area, a lounging zone, a fire feature surround. The second terrace, one step down, is sodded with premium Kentucky bluegrass—a flat, lush, perfectly mowable lawn where children can play safely, where a dog can run freely, where a croquet set or a lawn chair sits on level ground rather than sliding downhill. The third terrace is a garden terrace—structured planting beds with perennials, ornamental grasses, and strategic uplighting that transforms the retaining wall faces into architectural features after dark.
Each terrace is connected by stone steps integrated into the retaining wall structure—deep Charcoal treads set into the wall face, providing safe, elegant vertical circulation between levels. The steps are structurally independent of the wall (built on their own compacted sub-base), so they do not compromise the wall's structural integrity.
The Cinintiriks Standard for Slope Stabilization and Terracing
At Cinintiriks, we do not roll out green carpet and hope it stays put. Every slope project we execute in Woodbridge and across the GTA is engineered from the subgrade up, whether the solution is a stabilised sod installation or a full structural terracing system.
1. Site Assessment & Slope Analysis: We survey the slope gradient, total grade change, drainage patterns, and soil conditions. Slopes below 15 degrees are candidates for standard sod installation with minimal supplemental stabilisation. Slopes between 15 and 25 degrees require erosion control blankets and structural staking. Slopes above 25 degrees receive a terracing recommendation.
2. Soil & Drainage Evaluation: We assess native soil type (clay, silt, sand, or loam) and natural drainage. Clay-heavy soils common in Woodbridge drain poorly and generate more surface runoff, increasing the shear force on slope-installed sod. This assessment directly informs the staking density, the ECB specification, and the drainage infrastructure required behind retaining walls.
3. Erosion Control Engineering (Sod-on-Slope Projects): For moderate slopes receiving sod, we install commercial-grade coconut coir ECBs, anchored in a top-of-slope burial trench, overlapped and secured with U-pins. Sod is installed horizontally from the base upward, staggered, and staked at 6–8 stakes per square metre with 200 mm biodegradable wooden pegs. Irrigation is programmed for short-cycle, high-frequency delivery.
4. Retaining Wall Construction (Terracing Projects): Excavation to the full calculated depth. Compacted Granular A levelling pad (150 mm minimum). Deep Charcoal segmental retaining wall blocks installed course by course with proper batter. Clear stone backfill with perforated drain pipe at the base. Geotextile separation between clear stone and native soil. Geogrid reinforcement installed at engineer-specified intervals for walls requiring it.
5. Terrace Surface Finishing: Each terrace is graded to a uniform, level plane and finished according to the design plan: premium sod on lawn terraces (laid flat, with zero slope liability), Warm Off-White interlocking pavers on entertainment terraces, structured planting beds on garden terraces. All surfaces drain to controlled collection points.
6. Integrated Stairway Construction: Stone steps connecting the terraces are built on independent compacted sub-bases, with deep Charcoal treads set on a Granular A pad. The steps are integrated visually into the retaining wall aesthetic but are structurally independent to prevent imposing point loads on the wall structure.
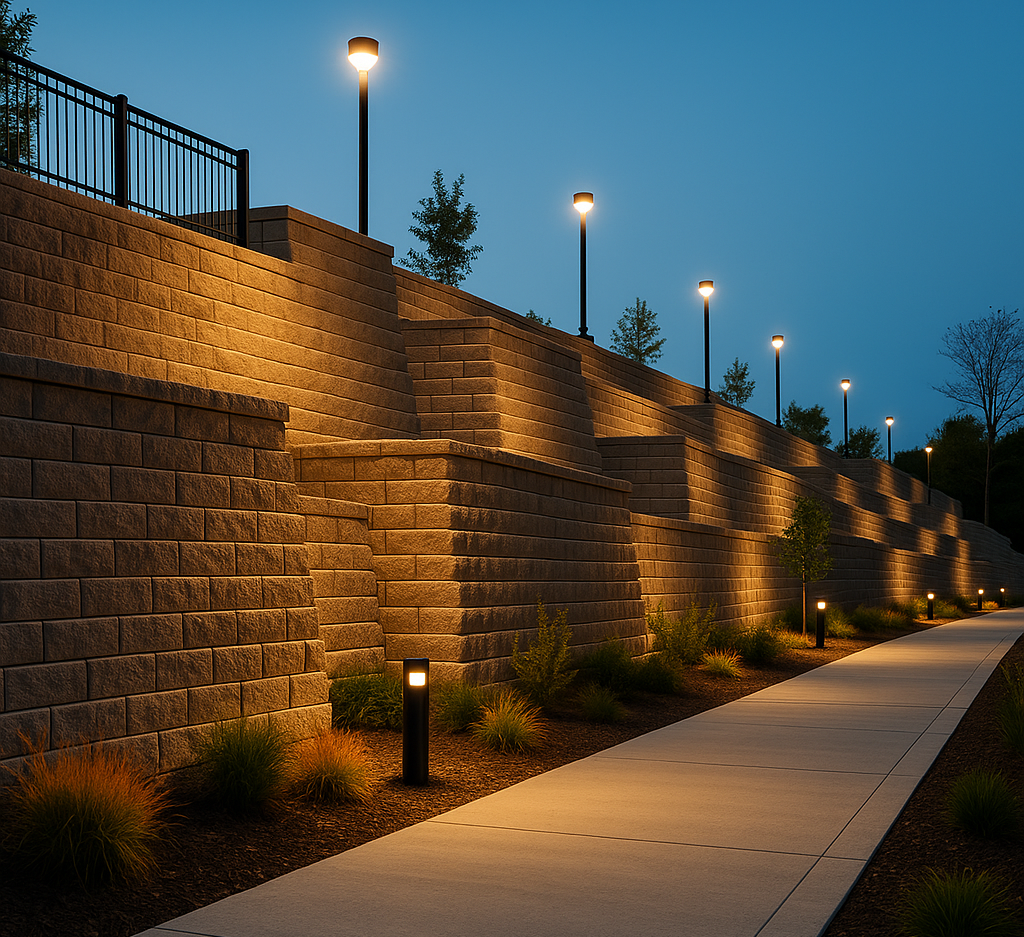
7. Landscape Lighting & Final Detailing: Low- voltage LED landscape lighting is integrated into the retaining wall faces, the step treads, and the planting beds. The lighting transforms the terracing system from a daytime landscape feature into an architectural element that defines the property after dark.
This is The Cinintiriks Standard for slope projects. Whether the solution is a stabilised sod installation that defies gravity through meticulous engineering, or a full structural terracing system that eliminates the slope entirely, every project is built to survive Ontario's climate, Ontario's soils, and the brutal physics of water and gravity on an inclined surface.
The Long-Term Value of Terracing
A successfully sodded steep slope gives you grass on a hill. A terraced slope gives you usable square footage. In the Woodbridge real estate market, where lot premiums are driven by livable outdoor space, converting a steep, unusable embankment into a multi-level patio, lawn, and garden environment can add significant value to the property—both in appraised value and in the daily quality of life the space provides.
The terracing system is permanent. The retaining walls are engineered for a service life of 30 to 50 years or more. The sod on the level terraces roots effortlessly (because the surface is flat), requires standard maintenance (because it can be mowed safely with any equipment), and looks consistently pristine (because it is not fighting gravity every moment of its existence).
The sod-on-slope solution, by contrast, is a permanent maintenance concern. Even a perfectly installed and rooted slope surface requires careful mowing technique, vigilant irrigation management, and periodic inspection for erosion channels, bare patches, and root-zone degradation. It works. But it works harder, and it demands more from the property owner in perpetuity.
FAQ: Sod on Steep Slopes
At what degree of slope does laying sod become a structural liability requiring a retaining wall?
There is no single universal threshold, but in our practice, we apply the following guidelines based on decades of work across the GTA. Slopes below 15 degrees (approximately a 4:1 grade) can receive sod with standard installation techniques and minimal supplemental stabilisation. Slopes between 15 and 25 degrees (3:1 to 2:1 grade) require erosion control blankets, horizontal installation, and structural staking to prevent failure during the establishment period. Slopes above 25 degrees (steeper than 2:1) present significant gravitational shear risk even with full stabilisation engineering, and we recommend structural terracing with retaining walls as the primary solution. Beyond 30 degrees, sod installation is inadvisable regardless of stabilisation method, and terracing becomes effectively mandatory for any maintained landscape surface. These thresholds can shift based on site-specific conditions: heavy clay soils, poor drainage, high-volume stormwater runoff, or long slope lengths may push the terracing recommendation down to 20 degrees.
What are biodegradable sod stakes, and are they absolutely required for a hillside installation?
Biodegradable sod stakes are wooden pegs, typically 200 to 250 mm long and 15 to 20 mm in diameter, sharpened at one end for easy driving. They are made from untreated hardwood or softwood that decomposes naturally in the soil over 6 to 12 months. On the alternative end, galvanised steel U-pins (150–200 mm long, 3 mm wire gauge) are used on very steep or high-risk slopes where maximum holding force is required; these do not decompose but remain permanently buried below the mowing surface. Are they required? On any slope above approximately 15 degrees, yes, absolutely. Without stakes, the sod has no mechanical connection to the earth during the 14- to 21-day root establishment period. Friction alone is insufficient to resist gravitational shear on a saturated surface at these angles. The stakes bridge the gap between installation and root establishment, providing the temporary anchorage that allows the permanent biological anchorage to develop. Skipping this step is the single most common cause of slope sod failure, and it is entirely preventable.
How do you irrigate fresh sod on a steep hill without the water running off and causing erosion?
Through a technique called short-cycle, high-frequency irrigation. Instead of running sprinklers for a single extended cycle (which delivers more water than the slope surface can absorb before gravity pulls it downhill), we program the irrigation controller for multiple short cycles of 5 to 8 minutes each, separated by 30- to 60-minute soak intervals . Each short cycle delivers a small, absorbable volume of water that has time to percolate into the soil before the next cycle begins. Three to four cycles per morning deliver the same total volume as a single 20- to 30-minute cycle, but without the destructive surface runoff. The key variables are cycle duration (short enough to prevent runoff), soak interval (long enough for absorption), and sprinkler head selection (low-precipitation-rate rotors or MP Rotator-style heads that deliver water slowly and uniformly rather than in a concentrated, high-volume spray that overwhelms the soil's infiltration capacity). On properties in Woodbridge without automatic irrigation, the same principle applies to manual watering: use a gentle, fan-shaped nozzle, apply water in short intervals, and never allow visible runoff to develop on the slope surface.
The Final Word
Can you install sod on a steep slope without it sliding? Yes. But only if you engineer the installation to counteract the physics that want to pull it downhill: erosion control blankets beneath the turf, horizontal installation from the bottom up, hundreds of structural stakes pinning the sod to the earth, and precision irrigation that delivers water without runoff.
Should you install sod on a steep slope? That is a different question. On moderate slopes, engineered sod installation is effective, practical, and cost-efficient. On severe slopes, it is a permanent maintenance liability that transforms the most dramatic feature of your property—the grade change that gives your lot its character and its views—into a surface you cannot use, cannot safely maintain, and cannot enjoy.
The better question is: what could that slope become? A multi-level outdoor living environment with flat terraces, stone walls, integrated steps, and a landscape lighting system that turns the hillside into the defining architectural feature of your property. That is not fighting the slope. That is conquering it.
Don't let your premium landscaping slide down a hill. Contact Cinintiriks for heavily engineered slope stabilization and structural terracing in Woodbridge.