You are now grilling by the light of your phone flashlight. Your guests cannot see the food on their plates. The beautiful stone veneer that you spent weeks selecting is invisible. The countertop—the single most visible surface on the kitchen—is a dark shadow. And the worst part: you already know that those cheap solar stick lights from the hardware store are not going to fix this. You tried them. They lasted six weeks. Their cold, blue-white light made your $80-per-square-foot natural stone look like the wall of a hospital corridor. And the adhesive-backed LED strip you stuck under the countertop overhang fell off into your salad the second time the grill heat hit it.
Lighting a luxury outdoor kitchen is not a decorating decision. It is an engineering discipline that requires the same level of planning, the same buried conduit infrastructure, and the same design-phase integration as the gas line, the electrical supply, and the plumbing. It is not something you add after the kitchen is finished. It is something you build into the kitchen—into the cinderblock cores, into the sub-base, into the countertop overhang, into the overhead pavilion structure—before the first stone veneer is set and the first countertop slab is templated.
This guide explains exactly how professional outdoor kitchen lighting is engineered, from the conduits buried in the sub-base to the fixtures recessed into the countertop lip, and why the difference between amateur and professional lighting is the difference between a backyard with a grill and a cinematic nightscape.
The Engineering: Conduits, Cores, and Hidden Infrastructure
The defining characteristic of professional outdoor kitchen lighting is that you cannot see how it works. No exposed wires. No surface-mounted conduit. No visible transformer boxes. No extension cords running across the patio to a GFCI outlet on the house. Every wire is inside a conduit. Every conduit is inside a wall core or buried beneath the sub-base. Every transformer is concealed inside the kitchen base or in a dedicated service chase. The light appears. The infrastructure is invisible.
Achieving this invisibility requires three layers of pre-installed conduit that must be in place before the finish materials are applied:
Layer 1: Sub-Base Conduit (Underground Feed)
The primary low-voltage power feed runs from the lighting transformer location (typically inside the kitchen base or at the house wall) to the kitchen island through a 20mm or 25mm Schedule 40 PVC conduit buried beneath the patio sub-base. This conduit is installed during Phase 1 earthwork, at the same time as the gas, electrical, and plumbing utility runs. It enters the kitchen’s structural concrete footing through a pre-cast sleeve and stubs up inside the cinderblock shell at a location accessible from above.
If the lighting transformer is located at the house (common on Hamilton properties where the transformer serves both the kitchen lighting and the broader landscape lighting system), the sub-base conduit may run 10 to 20 metres from the house to the kitchen. On longer runs, voltage drop becomes a design consideration. A 12V system loses approximately 1.5V per 30 metres of 14-gauge wire, which translates to a noticeable dimming of LED fixtures at the far end of a long run. Professional systems address this with either heavier gauge wire (12-gauge or 10-gauge) on long runs, or a dedicated satellite transformer mounted inside the kitchen base to minimise the 12V run length.
Layer 2: Vertical Core Conduit (Inside the Blockwork)
A typical outdoor kitchen shell is built from 200mm (8-inch) concrete masonry units (CMUs)—standard cinderblocks—stacked on the structural footing and reinforced with rebar and concrete fill in critical cores. The hollow cores of the CMUs that are not filled with concrete serve as natural wire chases. Low-voltage wire runs from the sub-base conduit stub-up vertically through the hollow cores to the fixture locations at the countertop, the under-counter zone, and the toe-kick level.
This is the critical timing element that most homeowners (and many contractors) miss: the wires must be pulled through the cores before the countertop is installed and before the stone veneer is applied. Once the granite or quartzite countertop is set and the veneer is adhered to the CMU face, the cores are no longer accessible. Any lighting wire that was not already in position is now permanently locked out. This is not a minor inconvenience. It is the single most common reason that outdoor kitchens end up with no integrated lighting or, worse, with messy surface-mounted aftermarket solutions.
The wire routing plan must specify exactly which CMU cores carry which circuits, where horizontal crossovers occur (using 90-degree sweep elbows between courses rather than sharp bends that damage wire insulation), and where the wire exits the blockwork to connect to the fixture. This plan is documented in the kitchen construction drawings and followed precisely by the mason during shell construction.
Layer 3: Fixture Recesses (Counter Edge, Toe-Kick, Veneer Face)
The final conduit layer is the fixture recess—the physical pocket or channel in the finish material where the light fixture sits. Under-counter strip lights sit in an aluminium extrusion channel (with a frosted diffuser lens) mounted to the underside of the countertop overhang or recessed into a routed channel in the countertop edge. Toe-kick lights sit in a recessed slot cut into the bottom course of the veneer face. Countertop task lights may be recessed into the underside of an overhead pavilion beam or mounted on adjustable arms that integrate with the pavilion structure.
Every recess is cut, routed, or built before the fixture is installed, and every fixture is hard-wired to the pre-routed low-voltage circuit inside the core. There are no plugs. There are no batteries. There are no adhesive mounts. Everything is mechanically fastened and permanently wired.
“If you can see how the lighting was installed, the lighting was installed wrong. Professional outdoor kitchen lighting is invisible infrastructure that produces visible magic.”
Task Lighting: Safe, Bright, Focused Illumination
Task lighting has one job: ensure you can see what you are cooking. This is a safety requirement, not an aesthetic one. A chef working a gas grill at 260-370°C (500-700°F) with a sharp carving knife in one hand and a pair of spring-loaded tongs in the other needs clear, shadow-free illumination across the entire cooking and prep surface. In Hamilton, where sunset drops to 8:45 PM by mid-August and 5:30 PM by early October, the evening entertaining season operates in near-darkness for the majority of the grilling window. Task lighting is not optional. It is the difference between a usable kitchen and a decorative one.
Overhead Pavilion Downlights
The most effective task lighting solution is recessed downlights mounted in the underside of an overhead pavilion, pergola, or dedicated kitchen hood structure. These fixtures provide wide, even illumination from above—mimicking the natural lighting angle of the sun and producing minimal shadows on the cooking surface.
Specification for overhead kitchen task lighting:
- Colour temperature: 3000K-4000K (Neutral White). Task lighting is deliberately warmer than clinical white (5000K+) but slightly cooler than ambient lighting (2700K). The 3000K-4000K range provides accurate colour rendering—critical for judging the doneness of meat, the freshness of vegetables, and the colour of sauces—without the harsh, cold quality that higher Kelvin temperatures produce. On a luxury outdoor kitchen where the surrounding ambient lighting is 2700K warm white, the slight Kelvin difference between the task fixtures and the ambient fixtures visually differentiates the cooking zone from the entertaining zone without creating a jarring colour clash
- CRI (Colour Rendering Index): Minimum 90+. CRI measures how accurately a light source renders colours compared to natural sunlight (CRI 100). Budget LED fixtures with CRI below 80 make food look grey, washed out, and unappetising. A CRI of 90+ ensures that the red of a rare steak, the green of fresh herbs, and the golden crust of a wood-fired pizza look natural and vibrant under artificial light
- Beam angle: 40-60 degrees. A focused beam concentrates light on the cooking surface rather than scattering it across the entire patio. Two to three downlights with 40-60 degree beam angles, spaced 600-900mm apart along the cooking zone, provide overlapping coverage that eliminates shadows between fixtures
- Mounting height: 2.1-2.7 metres above the countertop. This height provides sufficient spread without excessive brightness or glare. Fixtures mounted lower than 2.1 metres create hot spots and produce glare that is uncomfortable for the cook. Fixtures mounted higher than 2.7 metres lose intensity and produce broader, softer light that is less effective for precision task work
Adjustable Grill Lights
For kitchens without an overhead structure (or as supplementary lighting to pavilion downlights), adjustable gooseneck or articulating arm grill lights provide focused, directional illumination directly on the grill surface. These fixtures mount to the countertop edge, to the backsplash, or to a dedicated mounting post at the rear of the cooking zone. Professional-grade grill lights feature sealed, IP65-rated housings that withstand direct exposure to grill heat, grease splatter, rain, and UV radiation without yellowing, corroding, or failing.
In Hamilton, where the Lake Ontario microclimate produces higher humidity levels than inland areas and the escarpment funnels moisture-laden air across the lower city and mountain residential neighbourhoods, the IP (Ingress Protection) rating of outdoor lighting fixtures is particularly important. Fixtures rated below IP65 are vulnerable to moisture intrusion through the lens seals and electrical connections, leading to condensation inside the fixture housing, corrosion of the LED contacts, and premature failure. Every task lighting fixture on a Hamilton outdoor kitchen should be IP65 minimum, with IP67 preferred for fixtures mounted within the heat and grease zone directly above the grill.
Ambient Lighting: The Cinematic Mood Layer
If task lighting is about function, ambient lighting is about emotion. Ambient lighting is what transforms a heavy masonry kitchen island from a dark silhouette into a floating, glowing architectural object that anchors the nightscape of your entire outdoor living area. It is the layer of light that makes your guests stop mid-conversation and say, “This is incredible.”
Ambient lighting operates at significantly lower brightness than task lighting. It is not designed to illuminate work surfaces. It is designed to reveal texture, create depth, and establish mood. The fixtures are always concealed. The light appears to emanate from the architecture itself.
Under-Counter Wash Lighting
This is the single most impactful ambient lighting detail on an outdoor kitchen, and it is the detail that separates a professionally designed kitchen from everything else.
A continuous LED strip light (or a series of closely spaced puck lights) is mounted to the underside of the countertop overhang, concealed from direct view by the overhang depth. The light washes downward across the face of the Deep Charcoal stone veneer, grazing the textured surface at a shallow angle that emphasises every shadow, every grain, and every dimensional detail in the stone. The veneer that looked flat and monochromatic in daylight becomes a richly textured, three-dimensional surface under the warm amber wash of 2700K light.
Specification for under-counter wash lighting:
- Colour temperature: 2700K (Warm White). This is the colour of candlelight and firelight—the warmth that the human brain associates with comfort, intimacy, and relaxation. On Deep Charcoal stone veneer, 2700K light produces a warm amber glow that makes the stone look rich, organic, and expensive. Cool-white light (4000K+) on the same stone would make it look grey, cold, and institutional—the aesthetic difference is dramatic and irreversible once the wrong fixtures are installed
- Fixture type: Aluminium-channel LED strip with frosted diffuser. The aluminium channel serves as both a heat sink (critical for LED longevity) and a mounting substrate. The frosted diffuser eliminates the visible “dot pattern” of individual LED chips, producing a smooth, continuous wash of light rather than a row of bright points. Bare LED strips without a diffuser channel look cheap and produce harsh, uneven illumination—the opposite of the effect you want
- Output: 300-500 lumens per linear metre. This is low. Intentionally low. The under-counter wash is not task lighting. It is mood lighting. The goal is to reveal the veneer texture, not to flood the surface with light. Over-bright under-counter lighting creates a harsh glare zone that draws the eye to the light source rather than the surface it is illuminating. Restraint is the operative word
- Mounting position: Recessed 25-50mm behind the countertop lip. The fixture must be invisible from all normal viewing angles. A person standing at the bar side of the kitchen, a person seated at the dining table, and a person approaching from the patio walkway should all see the glowing veneer face without seeing the light source. If you can see the strip, the mounting position failed
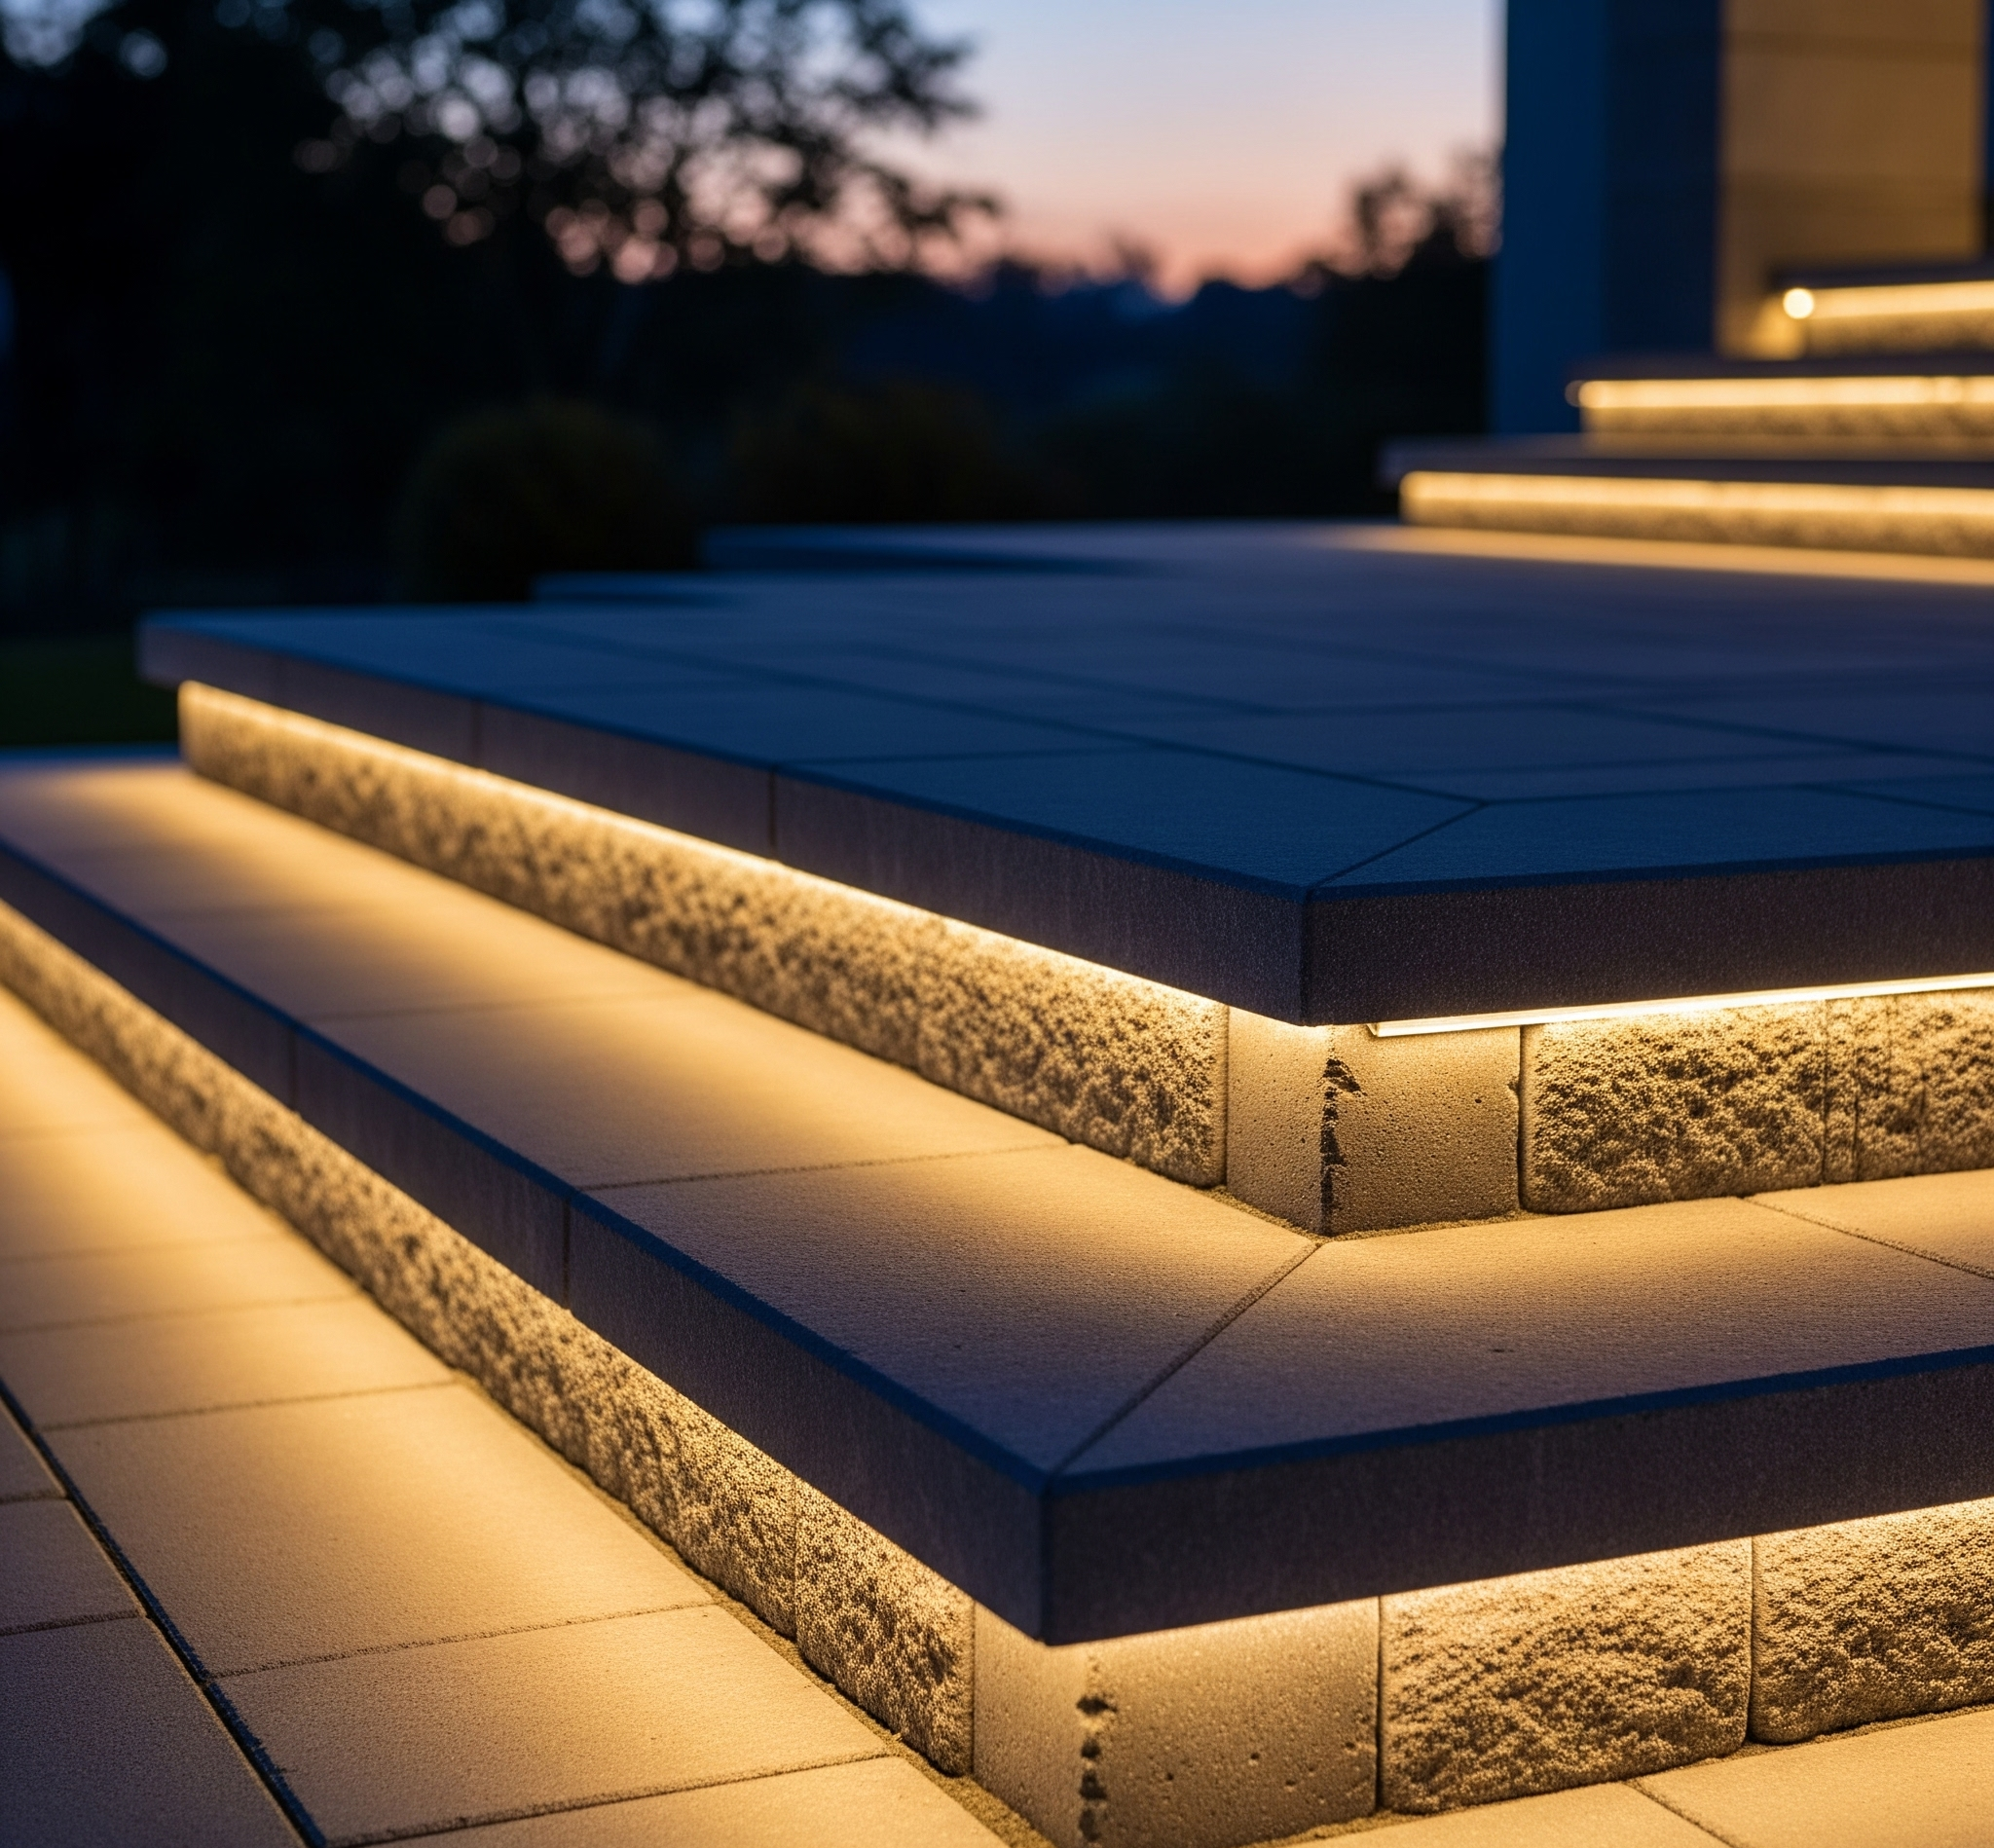
Toe-Kick Lighting
Toe-kick lighting is the detail that makes a 2,000-kilogram masonry kitchen island appear to float above the patio surface. A narrow, recessed LED strip (or a series of miniature puck lights) is installed in a reveal slot at the base of the kitchen—the junction where the veneer face meets the patio surface. The light washes outward and downward, illuminating a narrow band of the Warm Off-White paver surface beneath the kitchen and creating a luminous halo at the base of the structure.
The effect is architectural levitation. The heavy stone mass appears to be hovering 30-50mm above a plane of light. On the expansive Off-White patio surface that surrounds the kitchen, this light halo is reflected and amplified, creating a soft, even glow in the immediate vicinity of the kitchen that provides functional pathway illumination while simultaneously producing the most visually dramatic single lighting effect available in outdoor kitchen design.
Toe-kick fixtures must be IP67 rated (protected against temporary submersion) because their position at ground level exposes them to pooling rainwater, snowmelt, and debris accumulation. On Hamilton properties, where the escarpment neighbourhoods (Ancaster, Dundas, Upper Stoney Creek) experience heavier snowfall accumulation than the lower city, the toe-kick fixtures endure months of direct snow contact and repeated freeze-thaw exposure. IP67-rated marine-grade fixtures in 316 stainless steel or anodised aluminium housings survive these conditions indefinitely. Budget fixtures in painted housings corrode within two to three seasons.
Veneer Face Uplighting
On the entertaining side of the kitchen (the face opposite the cooking zone, where guests sit at the bar or mingle with drinks), small-aperture directional uplights can be recessed into the patio surface at the base of the veneer, projecting a narrow beam of warm light upward across the stone face. This uplighting technique reveals the stone texture from below—a different shadow angle than the downward under-counter wash—and creates a sculptural, gallery-like illumination that makes the kitchen island read as a piece of architectural art after dark.
Uplighting is used sparingly—typically two to three fixtures per entertainment face, spaced to wash overlapping light zones—and always at 2700K to maintain colour consistency with the under-counter and toe-kick zones. The fixture wells are cut into the patio surface during paver installation, with the low-voltage feed routed through the sub-base conduit system.
Overhead Walnut Structure Highlighting
If the kitchen is sheltered by a cedar or composite pavilion finished in Rich Walnut, the wood surface itself becomes a lighting canvas. Linear LED strip lights concealed in the beam-to-beam recesses (the inside faces of the structural beams) wash warm 2700K light upward across the underside of the roof deck or louvres, illuminating the Walnut wood grain and creating a warm, amber ceiling plane that visually encloses the kitchen zone in a canopy of light.
This overhead ambient layer is the third dimension of the lighting composition. Under-counter lighting illuminates the vertical (the veneer face). Toe-kick lighting illuminates the horizontal (the patio surface). Overhead lighting illuminates the ceiling plane (the wood structure). Together, the three layers create a fully dimensional light environment that wraps the kitchen zone in warm illumination from all directions—without a single visible fixture.
“The light should feel like it comes from nowhere and everywhere at the same time. When you achieve that, the kitchen stops being a structure and starts being an experience.”
The Transformer: The Invisible Engine
Every low-voltage lighting system is powered by a transformer that converts household 120V AC power to 12V or 24V DC power for the LED fixtures. The transformer is the engine of the system, and its quality, sizing, and placement determine the reliability and performance of every fixture it feeds.
Sizing
The transformer must be sized to carry the total wattage of all connected fixtures with a minimum 20% headroom. If the total fixture load is 200W, the transformer should be rated at minimum 240W. This headroom prevents the transformer from running at full capacity (which generates excess heat and shortens transformer life) and provides capacity for future fixture additions without requiring a transformer upgrade.
Multi-Tap Output
Professional-grade transformers feature multi-tap outputs (12V, 13V, 14V, 15V) that allow the installer to compensate for voltage drop on longer wire runs. A fixture on a 20-metre run connected to the 14V tap receives approximately 12V at the fixture after line loss—the same brightness as a fixture on a 3-metre run connected to the standard 12V tap. Without multi-tap compensation, distant fixtures are noticeably dimmer than near fixtures, breaking the visual uniformity of the ambient lighting composition.
Smart Control
Modern low-voltage transformers include built-in smart control capabilities: Wi-Fi or Bluetooth connectivity, smartphone app control, programmable scheduling (dusk-to-dawn, timed on/off, seasonal programs), and zone-by-zone dimming. On a Hamilton outdoor kitchen, this means the homeowner can set the task lighting to full brightness during active cooking and then dim it to 30% when grilling is finished and the evening transitions to ambient entertaining—all from a phone.
Placement
The transformer is concealed in one of two locations: inside the kitchen base (mounted to the interior CMU face behind a ventilated access panel) or inside a dedicated utility chase at the house wall (behind a landscape-grade access enclosure). In both cases, the transformer must be accessible for future maintenance without removing stone veneer, countertops, or pavers. A transformer buried behind permanent finish materials is a maintenance nightmare that will eventually require destructive access.
The Cinintiriks Approach: Light Is Architecture
At Cinintiriks, lighting is not the last line on the kitchen quote. It is a design-phase discipline engineered with the same precision as the structural footing, the gas line, and the drainage system. We do not rely on aftermarket solar sticks, adhesive LED strips, or extension-cord-powered clip lights. We engineer fully integrated, permanently wired, invisible lighting systems that make your Hamilton outdoor kitchen as stunning at 10 PM as it is at 2 PM.
The Cinintiriks Standard: Integrated Kitchen Lighting
1. Lighting Designed at Blueprint Stage: Every outdoor kitchen lighting plan is produced during the design phase, before construction begins. The plan specifies fixture locations, fixture types, colour temperatures, beam angles, circuit assignments, conduit routing paths, core wire chases, transformer sizing, and control zone assignments. The lighting plan is integrated into the kitchen construction drawings. The mason, the electrician, and the stone installer all work from the same coordinated document.
2. Sub-Base Conduit Pre-Installed During Earthwork: All low-voltage power feeds are run in Schedule 40 PVC conduit buried beneath the patio sub-base during Phase 1 excavation. Conduits enter the kitchen footing through pre-cast sleeves. By the time the first paver is laid, every lighting circuit pathway from the transformer to the kitchen is already in place, permanently buried, and invisible.
3. Wire Pulls Through CMU Cores Before Finish: Low-voltage wiring is pulled through designated CMU hollow cores before the countertop is set and before the stone veneer is applied. Wire exits are positioned at exact fixture locations. There is zero exposed wiring on the finished kitchen. Every wire is inside a block core, inside a conduit, or behind a permanently sealed finish surface.
4. 2700K Warm-White Ambient Throughout: Every ambient fixture on a Cinintiriks outdoor kitchen is specified at 2700K colour temperature—the warm gold tone of candlelight and firelight. This temperature is consistent across under-counter wash, toe-kick, veneer uplighting, and overhead pavilion lighting. There is no colour temperature mismatch. The entire ambient layer reads as a single, unified warm glow.
5. IP65/IP67-Rated Marine-Grade Fixtures: Every fixture is specified for permanent outdoor exposure in a Hamilton winter environment: IP65 minimum for sheltered locations (under-counter, overhead), IP67 for exposed ground-level locations (toe-kick, paver uplights). Housings are 316 stainless steel or marine-grade anodised aluminium. LED modules are rated for 50,000+ hours of continuous operation (14+ years at 10 hours per day). We do not install fixtures that need replacing in three seasons.
6. Smart Transformer with Zone Control: Every Cinintiriks kitchen lighting system is powered by a multi-tap, Wi-Fi-enabled transformer with independent zone dimming. Task lighting operates on one zone. Under-counter ambient on a second. Toe-kick on a third. Overhead pavilion on a fourth. Each zone is independently adjustable from 0-100% brightness, programmable on custom schedules, and controllable from your phone. The transformer is concealed in an accessible, ventilated enclosure inside the kitchen base or at the house wall—serviceable without removing any finish materials.
Don’t ruin a luxury outdoor kitchen with dark prep zones or messy exposed wires. Contact Cinintiriks for a heavily engineered, fully illuminated outdoor living experience in Hamilton.
FAQ: Outdoor Kitchen Lighting
Can I add under-counter hardscape lighting to my outdoor kitchen after the stone is finished?
Technically yes, but the result will never match the quality of a pre-wired, pre-conduit installation. If the stone veneer is already applied and the countertop is set, there are no wire chases inside the CMU cores. The only option is surface-mounted fixtures with wires running along the exterior of the veneer face and secured with adhesive clips or surface-mount conduit. These wires are visible. They collect debris. The adhesive clips fail within a season or two due to UV degradation and temperature cycling. The visual result is a kitchen that obviously had lighting added as an afterthought—wire management becomes the visible feature rather than the light itself. There is one partial workaround: a skilled mason can cut a chase channel into the mortar joints between veneer stones using a diamond grinder, route the wire through the chase, and repoint the mortar over the wire. This hides the wire but is labour-intensive, risks damaging the veneer stones during cutting, and limits fixture placement to locations reachable by the surface chase. On Charcoal natural stone veneer, the repointed mortar joints are typically invisible after cure. On lighter veneers, the repair may be visible. The bottom line: if you are planning an outdoor kitchen and there is any possibility you will want integrated lighting (and you will), install the conduits and pull the wires before the finish materials go on. The cost of pre-wiring during construction is approximately $800-$1,500. The cost of retrofitting equivalent lighting after the stone is set is $3,000-$6,000+ with an inferior visual result.
What color temperature (Kelvin) is best for luxury outdoor kitchen lighting?
The answer depends on the function of the specific fixture: for ambient lighting (under-counter wash, toe-kick, veneer uplights, overhead pavilion wash), the ideal colour temperature is 2700K (Warm White). This produces the warm amber glow of candlelight that makes stone, wood, and masonry look rich, organic, and inviting. It is the colour of luxury. Every high-end restaurant, boutique hotel, and resort uses 2700K ambient lighting precisely because it makes materials look their best and makes people look their best. For task lighting (overhead cooking zone downlights, adjustable grill lights), the ideal range is 3000K-4000K (Neutral White). This slightly cooler temperature provides accurate colour rendering for food preparation—you need to see the true red of a rare steak, the true green of fresh basil, and the true golden crust of a grilled flatbread. At 2700K, reds and greens shift toward amber and lose accuracy. At 5000K+, the light becomes harsh, clinical, and cold—the colour of a supermarket meat counter, not a luxury outdoor kitchen. The critical rule is that every ambient fixture in the kitchen (and across the entire landscape lighting system) must be the same colour temperature. Mixing 2700K and 3000K ambient fixtures on the same kitchen veneer face produces a visible colour inconsistency—one section glows warm amber, the adjacent section glows slightly cooler—that destroys the seamless, unified quality that professional lighting is designed to achieve. Task lighting can be a different temperature from ambient lighting because it serves a different function in a spatially separated zone. But all ambient must match. No exceptions.
How do I safely hide the wires and transformers for low-voltage outdoor lighting?
The only method that produces a permanently clean, professional result is pre-installed conduit and core routing: (1) Sub-base conduit: 20-25mm Schedule 40 PVC conduit buried beneath the patio granular sub-base during Phase 1 earthwork, connecting the transformer location to the kitchen footing. (2) CMU core routing: low-voltage wire pulled vertically through the hollow cores of the kitchen’s cinderblock shell, exiting at pre-planned fixture locations, before the countertop and veneer are installed. (3) Aluminium channel mounting: LED strip fixtures housed in extruded aluminium channels (with frosted diffuser lenses) mechanically fastened to the countertop underside, inside dedicated counter-edge routing, or inside a recessed slot in the veneer reveal. The transformer is concealed inside the kitchen base (mounted to interior blockwork behind a ventilated access panel) or inside a weatherproof utility enclosure at the house wall. The access panel allows the transformer to be serviced, reprogrammed, or replaced without removing any stone, countertop, or paver material. Methods to avoid: adhesive-backed LED strips (they fall off in heat and moisture), solar-powered stick lights (inconsistent output, cheap housings that crack in frost), extension cords to household outlets (code violation, trip hazard, fire risk), and battery-operated puck lights (dead batteries, constant replacement, inconsistent light output). Every one of these “solutions” signals that the lighting was not planned. Professional lighting is invisible because it was engineered into the structure, not taped onto it.
The Final Word
An outdoor kitchen without engineered lighting is an outdoor kitchen that stops working at sunset. The countertop disappears. The veneer goes dark. The cooking surface becomes a shadow. The $60,000 or $100,000 or $200,000 investment becomes furniture that you cannot see, cannot use safely, and cannot show off to the guests who are standing ten feet away with a drink in their hand.
Engineered lighting transforms that same kitchen into a cinematic nightscape. The Deep Charcoal veneer glows under the warm amber wash. The 2,000-kilogram masonry island floats on a halo of light. The Walnut pavilion ceiling radiates warm gold overhead. The cooking surface is lit with bright, shadow-free task light that makes night grilling as easy and safe as noon grilling. And not a single wire, not a single fixture, not a single transformer is visible.
That is the difference between a backyard with a grill and an outdoor living experience. That is The Cinintiriks Standard. Not decorated. Engineered.