A smooth concrete finish is not a cosmetic effect applied after the fact. It is a chemically precise intervention performed during a narrow window within the curing process—a window that shifts depending on temperature, humidity, wind speed, concrete mix design, slab thickness, and a half-dozen other variables that change with every project. Get it right and you have a surface that is dense, durable, and beautiful for decades. Get it wrong and you have a surface that looks fine for three months and then turns to dust under your feet.
This guide covers the real engineering behind smooth concrete finishes—the chemistry, the timing, the tools, and the critical safety distinction between surfaces that should be smooth and surfaces that absolutely should not—for homeowners and property managers across Uxbridge and the GTA who are investing in concrete that is meant to last.
The Chemistry of the Cure: Why Concrete Is Not Just Wet Cement
Before we talk about finishing techniques, you need to understand what concrete actually is, because the finishing process is inseparable from the curing chemistry. Most people think of concrete as wet cement that hardens as it dries. This is fundamentally wrong, and this misconception is responsible for more finishing failures than any other single factor.
Concrete does not dry. It hydrates. The Portland cement in the mix reacts chemically with water in an exothermic reaction (it generates heat) that produces calcium silicate hydrate (C-S-H) crystals—the microscopic interlocking mineral structures that give concrete its compressive strength. This reaction does not require the water to evaporate. In fact, if the water evaporates too quickly, the hydration stops prematurely, and the concrete never reaches its design strength. A 32 MPa concrete mix that loses its surface moisture too quickly can finish at 20 MPa or less at the surface—strong enough to walk on, but too weak to resist abrasion, freeze-thaw cycling, or de-icing salt exposure over time.
This is why curing is not drying. Curing is keeping the water in so the chemical reaction can proceed to completion. And this is exactly where the finishing process intersects with the chemistry: every time you touch the surface of fresh concrete with a finishing tool, you are physically manipulating the top layer of that chemical reaction. You are densifying the surface, closing the pores, and consolidating the cement paste into a tight, smooth skin. Done at the right moment, this creates a surface that is harder and more durable than the concrete beneath it. Done at the wrong moment, it creates a surface that is structurally disconnected from the mass below—a thin, weak shell that peels away like dead skin.
The Cardinal Sin: Adding Water to the Surface
Here is the single most destructive thing a concrete finisher can do, and it happens on job sites across Uxbridge and the GTA every single day: sprinkling water on the surface of setting concrete to make it easier to trowel.
The logic seems rational. The surface is starting to firm up. The trowel is dragging instead of gliding. So the finisher flicks water from a brush or a bucket onto the surface, re-wetting it to a workable consistency. The trowel glides again. The surface looks smooth. Job done.
Except what has actually happened is catastrophic. That added water has diluted the cement paste at the surface—the exact layer that is supposed to be the densest, hardest part of the entire slab. The water-to-cement ratio at the surface has now jumped from the designed 0.40 or 0.45 to something closer to 0.60 or 0.70. The resulting surface layer, once it finishes curing, has a fraction of the strength of the concrete immediately beneath it. It is porous instead of dense. It is weak instead of hard. And within the first winter in Ontario—where freeze-thaw cycles attack weak concrete surfaces relentlessly—that diluted top layer begins to dust, flake, spall, and delaminate.
The homeowner sees the surface disintegrating and assumes the concrete was a bad batch. The concrete was fine. The finisher killed the surface by adding water. And there is no repair that fully restores a delaminated surface. The damaged layer must be ground off and the slab either resurfaced with an overlay or replaced entirely.
At Cinintiriks, this is a career-ending offence. Any crew member who adds water to a finishing surface is removed from the project immediately. There are no warnings. There are no exceptions. The damage is irreversible and the client pays for it for the life of the slab.
The Pour Sequence: From Truck to Trowel
Understanding the finishing process requires understanding the full pour sequence, because each step creates the conditions for the next. You cannot separate the finish from the pour. They are a single, continuous operation.
Step 1: Placement and Vibration
Concrete arrives in a ready-mix truck at a specified slump (a measure of consistency—typically 100mm to 125mm for flatwork). It is placed into the forms using a chute, wheelbarrow, or concrete pump, depending on site access. The concrete is distributed to approximate grade and then vibrated—either with a handheld pencil vibrator (for thicker slabs and footings) or by tamping and rodding—to consolidate the mass, remove air voids, and ensure the concrete fills all corners of the formwork.
On larger pours in Uxbridge, where we are often placing garage floors, covered pavilion slabs, or structural retaining wall footings, we use a vibrating screed (power screed) that spans the full width of the pour and is drawn across the formwork on guide rails. The vibrating action consolidates the concrete and establishes the initial grade in a single pass, dramatically reducing the amount of hand work required. This is not a luxury tool—it is a quality control tool. Hand screeding over a 400-square-foot garage slab inevitably produces undulations and low spots. A power screed produces a surface that is flat to within 3mm over a 3-metre straightedge—the standard for architectural concrete flatwork.
Step 2: The Bull Float (Timing: 0 to 15 Minutes After Screeding)
Immediately after the surface has been screeded to grade, the bull float comes out. This is a large, flat tool—typically 900mm to 1200mm wide and made of either magnesium or aluminium—mounted on a long handle that allows the finisher to reach across the slab without stepping on the fresh concrete.
The bull float performs two critical functions simultaneously:
1. It pushes the coarse aggregate down. The stones in the concrete mix (typically 19mm to 25mm crushed stone) need to be below the finished surface, not poking up through it. The flat blade of the bull float presses them beneath the surface while allowing the finer material to fill in above.
2. It draws the cream to the top. The "cream" is the slurry of Portland cement paste and fine sand that constitutes the finishing layer of the slab. The sweeping action of the bull float consolidates this cream into a uniform layer across the entire surface. This is the layer that will eventually be troweled smooth. Without proper bull floating, the cream distribution is uneven—thick in some areas, thin in others— and the final surface will have inconsistent texture and density.
The bull float pass is not aggressive. It is a gentle, sweeping motion—the blade barely touching the surface, floating on the wet cream rather than digging into the concrete mass below. Pressing too hard seals the surface prematurely, trapping bleed water and air beneath a skin of paste. This is the beginning of delamination, and it happens before the finisher even picks up a trowel.
Why magnesium? Magnesium bull floats do not react with the alkalis in fresh concrete the way aluminium sometimes can (producing dark discoloration and hydrogen gas bubbles). Magnesium also glides with less friction than wood or aluminium, reducing the risk of tearing the surface. For architectural concrete work in Uxbridge, we use magnesium exclusively.
Step 3: The Wait (Bleed Water Evaporation)
This is the step that separates professionals from amateurs, and it is the step that requires the most discipline: you stop. You wait. You do not touch the concrete.
After the bull float pass, water begins to rise to the surface. This is bleed water—excess mix water that is pushed upward as the heavier aggregate and cement particles settle under gravity. Bleed water is completely normal. It is not a defect. A standard 32 MPa ready-mix concrete with a 0.45 water-to-cement ratio will produce a visible film of bleed water on the surface within 15 to 45 minutes of placement, depending on the slab thickness, air temperature, humidity, and wind exposure.
The critical rule: you do not perform any finishing operations —no troweling, no edging, no jointing—while bleed water is still present on the surface. The bleed water must fully evaporate before the next finishing step begins.
Why? Because troweling a surface that still has bleed water on it does two destructive things simultaneously:
1. It traps water beneath a sealed surface. The steel trowel closes the pores of the cream layer, creating a dense skin on top while a thin film of water remains trapped immediately beneath it. As the concrete continues to cure, this trapped water creates a plane of weakness —a horizontal void at the exact point where the finished surface meets the concrete mass below. The surface is no longer bonded to the body of the slab. It is sitting on a film of water that will eventually be consumed by hydration or evaporation, leaving a microscopic air gap. This gap is the genesis of delamination—the surface peeling away in sheets, sometimes weeks later, sometimes during the first freeze-thaw cycle.
2. It works excess water into the surface paste. The trowel physically mixes the bleed water into the cream, diluting the cement paste exactly as described in the "adding water" section above. The surface becomes weak, porous, and susceptible to dusting and scaling.
The waiting period varies dramatically with conditions. On a hot, dry, windy August afternoon in Uxbridge—30°C, low humidity, steady breeze—bleed water can evaporate in 20 to 30 minutes. On a cool, humid, still October morning—10°C, high humidity, no wind— the same slab might hold bleed water for 90 minutes to 2 hours. The finisher must read the conditions, watch the surface, and wait.
The test is simple and definitive: press your finger into the surface. If water rises around your fingertip, the surface is still bleeding. Wait. If your finger leaves an impression but no water appears, the bleed water has evaporated and the surface is ready for finishing. If your finger barely leaves a mark, you have waited too long and the concrete is beginning to set—you must move immediately.
Step 4: Hand Troweling or Power Troweling
Once the bleed water has fully evaporated and the concrete has stiffened to what finishers call the "thumbprint hard" stage—firm enough to support light pressure without deforming, but soft enough to accept the trowel—the finishing begins in earnest.
Hand troweling uses a flat steel trowel (typically 400mm to 500mm long) held at a slight angle to the surface. The first pass is relatively flat—the trowel blade nearly parallel to the concrete—closing the surface pores and consolidating the cream. Each subsequent pass increases the trowel angle slightly, generating more pressure and producing a progressively denser, smoother surface. A typical smooth finish requires 3 to 5 trowel passes, each one slightly more aggressive than the last, with 10 to 20 minutes between passes to allow the concrete to continue stiffening.
Power troweling uses a motorised finishing machine—either a walk-behind or ride-on unit with rotating steel blades—that performs the same compressive, densifying action at considerably higher speed and consistency. Power trowels are standard for large flatwork projects: garage floors, warehouse slabs, covered pavilion decks, and commercial interiors. The machine's rotating blades apply uniform pressure across the entire surface, producing a finish that is consistently flat and uniformly dense in a way that hand troweling over large areas cannot reliably achieve.
On garage floors and interior pavilion slabs in Uxbridge, we use walk-behind power trowels with interchangeable blades—float pans for the initial pass (to replicate the bull float action mechanically) and finish blades for the subsequent burnishing passes. The result is a surface that is glass-smooth, extremely dense, and highly resistant to dusting and abrasion—the hallmark of professionally finished architectural concrete.
Step 5: Curing Protection
The finishing is done, but the chemistry is not. The concrete must now cure—which means the water remaining in the mix must be retained long enough for the hydration reaction to reach its target strength. For a 32 MPa exterior mix, this takes a minimum of 7 days of continuous moisture retention.
Curing methods include:
- Curing compound: A liquid membrane sprayed onto the finished surface that forms a thin film, retaining moisture within the slab. This is the most common method for exterior flatwork and is applied immediately after final troweling
- Wet curing: Keeping the surface continuously moist by covering it with wet burlap, plastic sheeting, or by misting with water at regular intervals. This is the gold standard for maximum strength development but is labour-intensive
- Insulated blankets: For cold-weather pours (below 10°C), insulated curing blankets retain both moisture and the exothermic heat generated by hydration, keeping the concrete above the critical minimum curing temperature of 10°C. In Uxbridge, where fall and early spring pours are common, insulated blankets are standard equipment on every Cinintiriks concrete project
Skipping or shortening the curing period is the second most common cause of surface failure after premature troweling. A slab that is finished perfectly but left uncured in dry, windy conditions will lose surface moisture rapidly, halting hydration in the top 3 to 5mm. The result: a weak, dusty surface layer that peels and powders under traffic, despite looking perfectly smooth when the finisher walked off the job.
The Liability of "Smooth": When a Perfect Finish Is a Dangerous Finish
Here is the part of the conversation that most homeowners do not want to hear, and that most contractors never bring up: a glass-smooth, steel-troweled concrete finish is a potentially catastrophic liability on any outdoor surface in Ontario.
The issue is traction. A power-troweled concrete surface is, by design, extremely smooth. That is the entire point. The pores are closed. The surface is dense and polished to a near-sheen. On a dry interior floor—a garage, a workshop, a covered pavilion with a roof overhead— this finish is ideal. It resists staining, is easy to clean, does not harbour dust in open pores, and provides adequate traction for foot traffic and vehicle tires under dry conditions.
Now put that same surface outside. Expose it to rain. Let frost form on it overnight. Let a thin film of ice glaze it after a January freezing rain event in Uxbridge. That glass-smooth finish becomes a skating rink. There is no texture to interrupt the water film. No micro-profile to provide mechanical grip under a shoe sole. The coefficient of friction under wet or icy conditions drops to dangerously low levels— lower, in many cases, than a polished marble floor.
The legal implications are significant. A slip-and-fall on a smooth concrete walkway, patio, or pool deck can result in serious injury and a personal liability claim. If it can be demonstrated that the property owner installed (or allowed the installation of) a finish that did not meet the traction requirements of CSA A23.1 for exposed exterior surfaces, the liability is difficult to defend. The standard is clear: exterior concrete surfaces must have a textured finish that provides adequate slip resistance under wet conditions.
The Architectural Broom Finish: Beauty and Safety Combined
The solution for exterior concrete is the broom finish— specifically, what we call an architectural broom finish, which is a far cry from the coarse, utilitarian drag-broom texture you see on public sidewalks.
An architectural broom finish is achieved by drawing a fine-bristle broom across the surface after the bull float and initial trowel passes have been completed, but before the concrete reaches its final set. The timing is critical: too early and the broom digs into the soft cream, leaving ragged furrows; too late and the bristles skate across the hardened surface without imparting meaningful texture.
Done properly, the architectural broom finish produces a fine, uniform, parallel texture with a line depth of approximately 1mm to 2mm— deep enough to provide excellent wet-weather traction, shallow enough to be comfortable under bare feet and easy to clean. The surface reads as intentionally designed rather than roughly textured. It is elegant enough for a front walkway, a covered porch, or a backyard patio, while providing the mandatory traction safety that a smooth finish cannot deliver.
The Modern Luxury Combination: Smooth Vertical, Textured Horizontal
For clients who want the dramatic, modern aesthetic of perfectly smooth architectural concrete and the safety of textured walking surfaces, we consistently recommend a combination approach that delivers both:
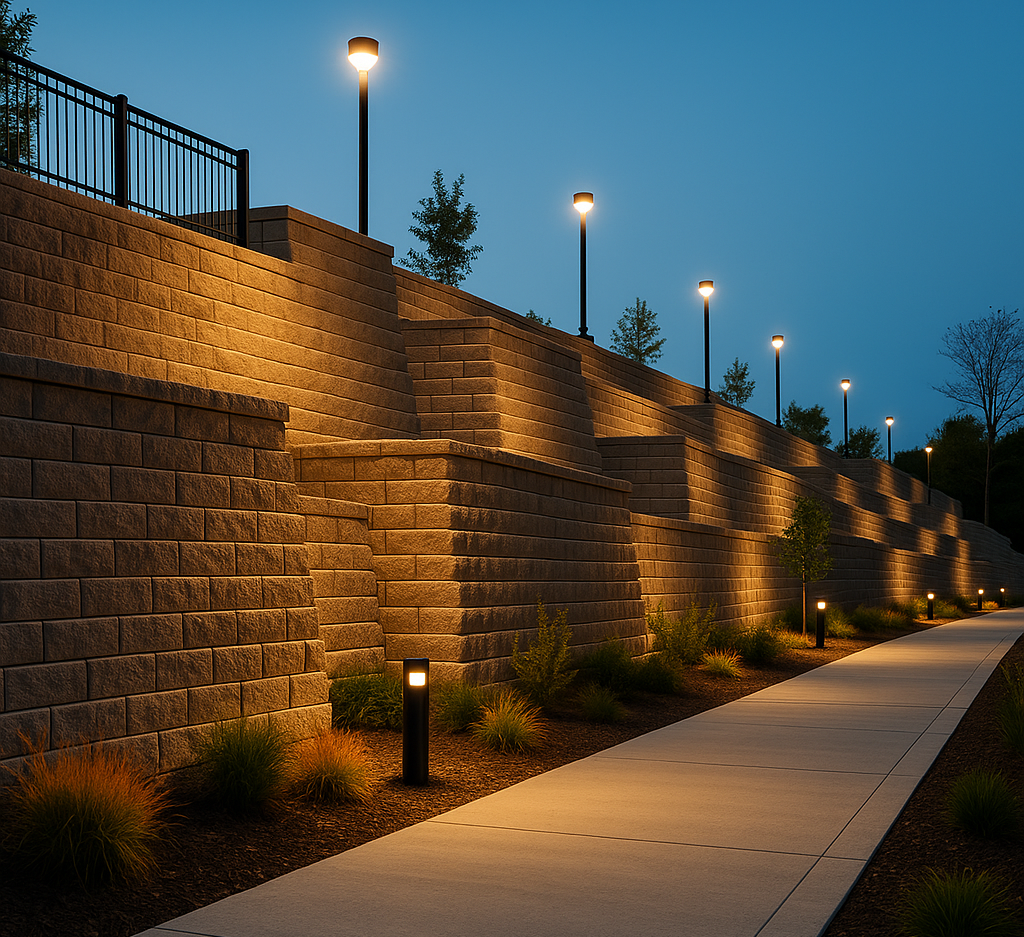
Vertical poured concrete surfaces—retaining walls, seat walls, planter surrounds, step risers—are finished to a glass-smooth, deep Charcoal form-finished surface. Nobody walks on a vertical wall. Traction is irrelevant. The smooth finish showcases the density and quality of the concrete, creates dramatic shadow lines, and reads as unambiguously modern and architectural.
The horizontal walking surface—the patio floor, the walkway, the pool deck—is executed in expansive Warm Off-White interlocking pavers with a subtle surface texture that provides excellent wet-weather traction while maintaining a clean, premium aesthetic. The pavers introduce warmth, colour, and architectural detail that a monolithic concrete floor cannot match, while the Charcoal concrete walls provide the bold, dramatic vertical contrast.
The result is a space that feels thoroughly modern and luxurious—smooth concrete walls framing a warm, textured paver floor—while meeting every safety and building code requirement for exterior surfaces. This is the combination we install most frequently in Uxbridge for covered outdoor living areas, modern patios, and elevated pool surrounds.
The Cinintiriks Approach: Chemically Precise, Structurally Flawless
At Cinintiriks, we do not cut corners by adding water to curing slabs. We do not rush the bleed water stage to stay on schedule. We do not install smooth finishes on surfaces where textured finishes are required for safety. Our Cinintiriks Standard for Concrete Finishing is a strict, chemistry-driven protocol that ensures every slab we pour in Uxbridge cures to its maximum structural density and looks immaculate for decades:
1. Mix Design Specification: We specify the concrete mix for every project based on the application. Exterior flatwork receives a minimum 32 MPa air-entrained mix with 5% to 8% air content (for freeze-thaw resistance) and a maximum water-to-cement ratio of 0.45. Interior slabs (garages, pavilions) receive a 32 MPa non-air-entrained mix for maximum surface density and trowel-ability. We never accept "whatever is on the truck"—the mix is specified in advance and confirmed on the delivery ticket before a single yard is placed.
2. Timing Discipline: Our finishers are trained to read conditions—temperature, humidity, wind, slab thickness, mix slump— and adjust the finishing schedule accordingly. On a hot, dry August pour, the bleed water window may close in 20 minutes. On a cool, damp October pour, it may not close for 90 minutes. We wait. Every time. No exceptions.
3. Zero Added Water: No water is ever added to the surface of fresh concrete during finishing. If the surface is setting faster than the crew can finish it, we deploy additional finishers or reduce the pour rate to match the finishing speed. The solution is more hands, not more water.
4. Application-Specific Finishes: Covered, protected interior slabs receive a power-troweled smooth finish for maximum density, cleanability, and aesthetic refinement. Exposed exterior slabs receive an architectural broom finish for code-compliant traction with a refined visual character. Vertical concrete surfaces receive smooth form finishes using premium form-release agents and precisely aligned formwork for a flawless, architectural surface.
5. Mandatory Curing: Every slab is cured for a minimum of 7 days using curing compound (exterior) or wet burlap and plastic sheeting (high-performance interior). Cold-weather pours are protected with insulated curing blankets and monitored for minimum curing temperature compliance. No slab leaves our control without completing the full curing protocol.
"The finish is not the last thing you do to concrete. It is the most important thing you do to concrete. Every minute of timing, every trowel pass, every decision to wait—it all shows up in the surface, forever."
Don't let an amateur ruin your concrete with a flaking, dusty finish. Contact Cinintiriks for heavily engineered, structurally flawless concrete and hardscaping in Uxbridge.
FAQ: Concrete Surface Finishing
Why is the surface of my newly poured concrete patio dusting and flaking off?
In the vast majority of cases, the cause is one of three finishing errors—or a combination of them. First: premature troweling. If the finisher began steel-troweling while bleed water was still present on the surface, the trowel sealed a weak, water-diluted layer of cement paste over a film of trapped moisture. As the concrete continued to cure, that trapped water created a void between the finished surface and the concrete mass below. The surface layer, already weakened by excess water, lost its bond to the slab. The first freeze-thaw cycle expanded any remaining moisture in the void, physically popping the surface layer off in sheets and flakes. This is delamination, and it is irreversible without grinding and resurfacing. Second: water addition during finishing. If the finisher sprinkled water on the surface to make the trowel glide more easily, the water-to-cement ratio at the surface was diluted far beyond the design specification. The resulting surface layer cured to a fraction of its intended strength—porous, soft, and incapable of resisting abrasion or weather exposure. This surface dusts under foot traffic and scales under de-icing salt. Third: inadequate curing. If the finished surface was left exposed to sun, wind, and dry air without curing compound, wet burlap, or plastic sheeting, the surface moisture evaporated before the hydration reaction could finish. The top 3 to 5mm of the slab never reached its design strength. It remained porous and weak, even though the bulk of the slab below may be perfectly sound. The fix for all three conditions is the same: the damaged surface layer must be mechanically removed (grinding or shot-blasting), and the slab must be resurfaced with a bonded polymer-modified cementitious overlay or replaced entirely if the damage extends beyond the surface.
Is a perfectly smooth, steel-troweled concrete finish safe for an outdoor pool deck?
No. Absolutely not. A steel-troweled smooth finish on an outdoor pool deck is one of the most dangerous surface combinations in residential construction. Pool decks are, by definition, continuously wet surfaces. Bare feet, pool water, sunscreen, and body oils create a film on the surface that reduces friction dramatically. A smooth, closed-pore concrete surface has no micro-texture to interrupt this film. Underfoot, it becomes extremely slippery—approaching the coefficient of friction of wet tile. Slip-and-fall injuries on smooth concrete pool decks are among the most common residential liability claims in Ontario. The correct finish for an outdoor pool deck is either a medium broom finish (providing excellent wet-traction without being uncomfortable under bare feet) or, as we recommend at Cinintiriks, textured interlocking pavers specifically designed for pool surrounds. Premium pool-deck pavers have a calibrated surface texture that provides high traction when wet, low heat absorption (so they remain comfortable under bare feet in direct sun), and exceptional drainage through the joint system. They are also individually replaceable if damaged by pool chemicals or furniture—a significant advantage over monolithic concrete, which cannot be spot-repaired without leaving a visible patch. If you are building a pool deck in Uxbridge or anywhere in the GTA, a smooth concrete finish should not be on the specification. It is a safety failure and a liability risk that no amount of aesthetic appeal justifies.
Can you grind and polish an existing rough concrete slab to make it perfectly smooth?
Yes, but with significant caveats. Concrete grinding and polishing is a well-established industrial process that uses progressively finer diamond abrasive discs (starting at 30-50 grit and finishing at 800-3000 grit, depending on the desired sheen level) to mechanically remove the surface texture and expose the dense, hard concrete beneath. The process can transform a rough broom-finished, troweled, or even damaged concrete surface into a high-gloss, stone-like finish that rivals polished marble in appearance. However, the process has strict requirements. The concrete must be structurally sound. Grinding removes the top 1 to 3mm of surface material. If the concrete beneath is weak, porous, or delaminated, grinding will expose the defect rather than eliminate it. The slab must be at least 28 days old (fully cured) before grinding, and ideally 90 days or older for maximum surface hardness. Air-entrained concrete does not polish well. The air voids that provide freeze-thaw resistance in exterior concrete also create visible pinholes in a polished surface. Polished concrete is therefore best suited for interior applications (garages, basements, workshops, commercial floors) where a non-air-entrained mix was used. For exterior surfaces in Ontario's freeze-thaw climate, polishing an air-entrained slab will produce a surface that is pockmarked with tiny craters—not the glass-smooth finish the homeowner envisioned. Finally, polished concrete is smooth. All of the traction concerns discussed above apply in full. Polished concrete is suitable for protected interior surfaces only. For exterior use in Uxbridge, a textured paver system or an architectural broom finish remains the correct choice.
The Final Word
A smooth concrete finish is not a product you buy. It is a chemical event that you either manage correctly or you do not. The line between a surface that lasts thirty years and one that disintegrates in three winters is measured in minutes of timing, millimetres of trowel angle, and the absolute refusal to add a single drop of water to the surface.
The tools are simple. The chemistry is unforgiving. And the difference between a crew that understands the process and one that does not will be written in the surface of your concrete for as long as it exists.
We understand the process. We have built our reputation on it.