The honest answer is: it is one of the most deceptively dangerous projects in residential hardscaping. Not because the concrete itself is complicated, but because you are asking two separate structures—one old and settled, one new and fresh—to behave as a single surface in a climate that does everything it can to tear them apart. And if the engineering underneath is not done correctly, Ontario's freeze-thaw cycles will punish that oversight every single winter until the walkway is a cracked, heaved, separated mess that looks worse than if you had never built it at all.
This guide covers the structural reality behind installing a walkway alongside an existing driveway—the sub-base engineering, the mechanical tying methods, the drainage requirements—and why the luxury alternative of interlocking pavers may be the smarter long-term investment for homeowners in Uxbridge and across the GTA.
The Danger of Differential Settlement: Two Structures, Two Minds
Here is the fundamental problem that most homeowners do not see until it is too late. Your existing driveway—whether it is concrete, asphalt, or interlock—has been in the ground for years. It has already gone through its initial settlement. The sub-base underneath it has compacted under the weight of the slab and the vehicles driving over it. The soil has adjusted. The frost has pushed it and released it through dozens of cycles, and the structure has found its equilibrium. It is not perfectly still—nothing in Ontario soil ever is—but it has reached a state of relative stability.
Now you pour a brand-new walkway right next to it. This new walkway is sitting on freshly excavated and backfilled ground. Even if the contractor compacted the gravel reasonably well, that new base has not experienced a single freeze-thaw cycle yet. It has not settled under traffic load. It has not had water migrate through it for a full season. It is, in engineering terms, immature.
What happens next is entirely predictable. The first winter arrives. The frost penetrates the new sub-base and the soil beneath it. The water in that soil freezes and expands, pushing the new walkway upward. Meanwhile, the old driveway—sitting on its seasoned, compacted base—moves differently. Maybe it heaves less. Maybe it heaves at a different rate. Maybe it does not heave at all in that particular spot. The two structures move independently, and the joint between them opens.
By spring, you have got a gap. Sometimes a quarter inch. Sometimes an inch. The gap fills with water and debris over the summer. The following winter, ice forms in the gap and wedges it wider. The walkway heaves again, but now it has lost contact with the driveway edge, so it tilts outward slightly. A lip forms. The lip becomes a trip hazard. The trip hazard becomes a liability. And by year three, the new walkway looks like it was installed by someone who had never heard of the word frost.
This is differential settlement—what happens when two adjacent structures, built at different times on bases of different maturity, respond differently to the same environmental forces. It is the number one failure mode for residential walkways installed alongside existing driveways in Uxbridge and across the GTA. And it is almost entirely preventable, if the engineering is done right.
The Sub-Base: Matching What Is Already There
The first and most critical step in preventing differential settlement is ensuring that the new walkway sits on a sub-base that is structurally equivalent to the one under your existing driveway. This is not a suggestion. It is an engineering requirement.
Why You Cannot Just Scrape and Pour
The single most common shortcut we see on failed walkway installations across Uxbridge and the broader GTA is this: a contractor scrapes off the topsoil alongside the driveway to a depth of about four inches, maybe throws down two inches of gravel, tamps it with a hand tamper, and pours concrete directly on top. Total depth below finished grade: six inches. Total engineered drainage: zero.
Meanwhile, the existing driveway next to it is sitting on 8 to 12 inches of compacted Granular A or clear stone, placed over undisturbed native sub-grade or engineered fill. The driveway was built to carry vehicle loads. The walkway was built to carry conversation.
The problem is not the load capacity. You do not need a walkway to hold up a truck. The problem is frost depth. A sub-base that is only four to six inches deep in Uxbridge—where the frost line regularly penetrates to 1.2 metres or deeper—provides virtually no protection against frost heave. The frost blows right through that thin granular layer and into the native clay underneath, where the water is sitting and waiting to freeze. The walkway heaves. The driveway, on its deeper base, does not heave as much (or at all). The joint separates.
The Engineered Sub-Base Protocol
To prevent differential settlement, the walkway sub-base must meet or exceed the depth and drainage performance of the existing driveway base. In practice, this means:
Excavation depth: A minimum of 10 to 14 inches below finished grade for a pedestrian walkway on clay-heavy soils (which covers most of Uxbridge and the surrounding Durham Region). For a walkway that will occasionally support vehicle traffic—say, a widened parking apron—the excavation depth increases to 14 to 18 inches.
Geotextile fabric: A heavy-duty non-woven geotextile is laid over the excavated native soil before any granular material is placed. This fabric prevents the clay sub-grade from migrating upward into the granular base over time, which would gradually clog the drainage voids and re-create the frost-heave conditions you are trying to eliminate.
Granular base material: Granular A (a graded mixture of crushed stone and stone dust that compacts extremely well) or clear stone (19mm washed aggregate) for maximum drainage. In areas where the water table is high or the surrounding grading directs significant runoff toward the driveway, clear stone is the superior choice because it provides virtually unlimited drainage capacity —water falls through it rather than sitting in it.
Compaction: The granular base is compacted in lifts of 100mm to 150mm (4 to 6 inches), each lift receiving multiple passes with a vibratory plate compactor before the next lift is placed. The target is 95% Standard Proctor Density—the same compaction standard used for road sub-bases. Compacting the full depth in one pass does not work. The energy dissipates with depth, leaving the bottom layers loose and prone to settlement.
This is heavy civil work. It requires an excavator, a dump trailer for soil removal, a delivery of engineered aggregate, and a heavy plate compactor. It is not a weekend project with a shovel and a bag of gravel from the hardware store. The majority of what you are paying for will be invisible once the walkway is finished. And that invisible base is the only thing standing between your new walkway and annual frost-heave failure.
Tying In: Connecting Two Structures Into One
Even with a properly engineered sub-base, you still face the challenge of joint behaviour—what happens at the seam where the new walkway meets the existing driveway. Two separate slabs poured at different times, sitting on bases that compacted at different rates, will always have some degree of differential movement. The question is: do you allow that movement and manage the joint, or do you prevent the movement by mechanically locking the two structures together?
Option 1: Doweling Into Existing Concrete
If the existing driveway is poured concrete, the strongest mechanical connection is rebar doweling. This involves drilling horizontal holes into the exposed edge of the existing concrete slab at regular intervals (typically every 12 to 18 inches), inserting lengths of #4 rebar (1/2-inch diameter steel reinforcing bar) that extend 12 to 18 inches into the old slab and 12 to 18 inches into the new pour, and bonding them with structural epoxy.
When the new concrete cures around the embedded rebar, the two slabs are physically connected. Any frost force pushing up on the new walkway must also lift the old driveway (or vice versa), which means the two structures move as a single monolithic unit rather than independently. Differential settlement is eliminated because the structures are no longer differential—they are one structure.
Doweling is the gold standard for concrete-to-concrete connections. But it has requirements that must be met precisely:
- Hole diameter: Drilled holes must be at least 1/8 inch larger than the rebar diameter to allow room for epoxy to fully surround the bar
- Hole depth: Minimum embedment of 12 inches into the existing slab. If the slab is only 4 inches thick, you cannot achieve proper embedment depth, and doweling becomes impractical—the bar will pull out of the slab rather than holding the joint
- Epoxy type: Structural-grade anchoring epoxy (not construction adhesive, not polyurethane caulk). The epoxy must be rated for wet concrete contact and freeze-thaw cycling
- Timing: The dowels must be installed before the new concrete is poured, so the wet concrete flows around and bonds to the protruding rebar. Drilling into the old slab after both are cured and trying to retrofit a connection does not produce a structural bond
Option 2: Isolation Joint (Allowing Movement)
If the existing driveway is asphalt—which is common in Uxbridge, where many older homes and rural properties have asphalt driveways—doweling is generally not an option. You cannot drill steel rebar into asphalt and expect a structural connection. Asphalt is a flexible pavement; it deforms rather than holding a rigid fastener.
In this case, the approach is the opposite: instead of locking the structures together, you deliberately separate them with an isolation joint. A strip of closed-cell polyethylene foam (expansion joint filler), typically 10mm to 12mm thick, is placed vertically between the driveway edge and the new walkway pour. This foam compresses and expands with the seasonal movement, preventing the two surfaces from grinding against each other.
The isolation joint is then sealed at the surface with a flexible polyurethane joint sealant—not rigid epoxy, not silicone (which does not bond to concrete or asphalt), but a purpose-made paving sealant that remains flexible through the full range of Ontario temperatures (-30°C to +35°C). The sealant keeps water and debris out of the joint while allowing the two structures to move independently without damage.
The practical result of an isolation joint: the walkway will move slightly relative to the driveway. Over several years, the joint may open or close by a few millimetres. The sealant accommodates this. The gap remains sealed. No trip hazard forms. But the appearance of the joint is never perfect—it always reads as a visible seam between two separate surfaces, because that is exactly what it is.
The Drainage Problem Nobody Thinks About
There is a critical drainage consideration that most contractors overlook entirely when installing a walkway alongside a driveway: where does the water go?
Before the walkway existed, rainwater and snowmelt shed off the driveway edge and drained into the adjacent lawn or garden bed. The soil absorbed it. The grading directed it away from the house. Everything worked.
Now you have paved over that drainage channel. The water that used to drain off the driveway edge now hits the walkway surface instead. If the walkway is graded toward the driveway (or flat), the water pools in the joint between the two surfaces. In winter, that pooled water freezes, expands, and attacks the joint. In summer, it sits and promotes weed growth, joint deterioration, and subgrade saturation.
Proper drainage design requires the walkway to be graded with a minimum 2% cross-slope falling away from the driveway—toward the lawn or a catch basin on the far side. This means the walkway surface is slightly lower at its outer edge than at the driveway edge, shedding water outward rather than trapping it in the joint. It is a simple grading principle, but it is violated constantly on DIY and budget contractor installations, and the consequences are predictable: joint failure, ice damming, and accelerated frost heave along the seam.
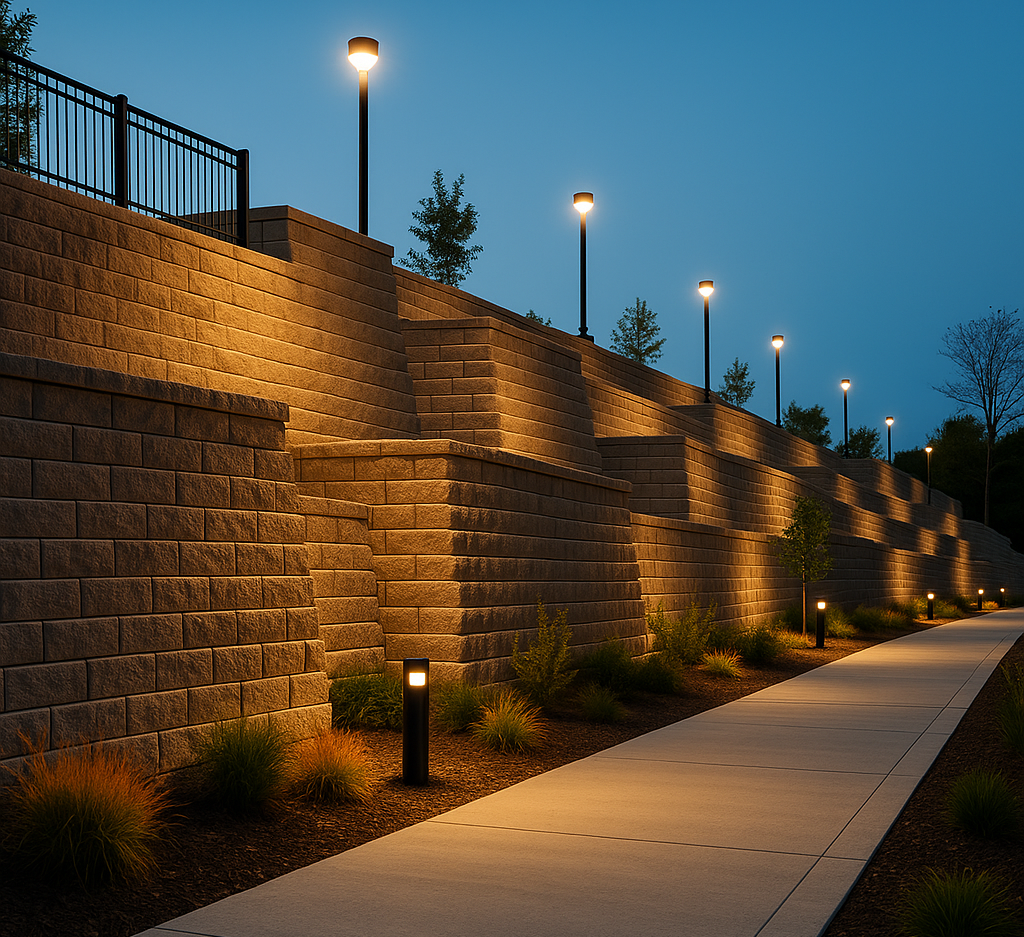
The Luxury Alternative: Interlocking Pavers Instead of Poured Concrete
Everything described above—the doweling, the isolation joints, the differential settlement risk, the rigid joint management—is a consequence of working with poured concrete, a rigid, monolithic material that cracks when it moves and cannot be repaired without demolition. There is a better way.
Why Segmental Pavers Eliminate the Biggest Risks
High-density segmental interlocking pavers solve the fundamental structural problem that makes concrete walkway extensions so risky: they do not require a mechanical connection to the existing driveway.
A paver walkway is not a monolithic slab. It is a system of hundreds of individual units, each one locked to its neighbours through joint sand and interlocking geometry, but free to micro-adjust independently in response to ground movement. The walkway does not need to be doweled into the driveway because it does not need to behave as a single rigid plane. Each paver flexes, tilts, rises, and settles by fractions of a millimetre as the frost pushes and releases the sub-base beneath it. The surface remains essentially flat—any undulation is so minor that a straightedge would barely detect it—and no crack ever forms, because there is no continuous rigid surface to crack.
The joint between the paver walkway and the existing driveway is managed with a flexible polymeric edge restraint and a clean, sealable gap of 6mm to 10mm, filled with matching polymeric sand or a flexible joint sealant. The gap accommodates seasonal movement without visual distortion. No rebar. No epoxy anchors. No destructive drilling into the existing structure. No monolithic bond to fail catastrophically when the frost hits.
For homeowners in Uxbridge—where the rural and semi-rural property layouts often feature long driveways with significant frost exposure on all sides—this flexibility is not an aesthetic preference. It is a structural imperative. A 40-foot poured concrete walkway alongside a 40-foot driveway in Uxbridge has 80 linear feet of joint that must survive 1.2-metre frost penetration every winter. A 40-foot paver walkway has zero continuous joints to fail, because the entire surface is already segmented.
The Aesthetic Transformation
Now set aside the engineering for a moment and consider what you are actually looking at when the project is done.
A poured concrete walkway alongside a driveway is a grey slab next to a grey (or black) slab. It is functional. It is utilitarian. It communicates nothing except "there is more pavement here now." It does not elevate the property. It does not contribute to curb appeal. It is infrastructure, not design.
An expansive Warm Off-White paver walkway, boldly bordered by a deep Charcoal soldier course, is an entirely different statement. The Off-White field creates a luminous, clean pedestrian surface that visually separates the walkway from the driveway—communicating that this is a dedicated path, not just an extension of the parking area. The Charcoal soldier course frames the walkway architecturally, giving it a defined edge that reads as intentional, permanent, and designed. The contrast between the warm paver surface and the darker driveway creates a visual hierarchy that makes the entire frontage look like it was planned from the beginning, not added as an afterthought.
This is the difference between a house that had some extra concrete poured beside the driveway and an estate that has a thoughtfully designed pedestrian approach. The cost difference is real. The value difference is disproportionately larger.
"The walkway you build alongside your driveway is the first surface your guests walk on. It is either a statement or an apology. There is no middle ground."
The Full Build Sequence: From Excavation to Finished Surface
Whether you choose poured concrete or interlocking pavers, the heavy civil work underneath is identical. Here is the step-by-step build sequence for a properly engineered walkway alongside an existing driveway:
Phase 1: Layout and Excavation
The walkway footprint is laid out with survey stakes and string lines, checked for square against the driveway edge and for consistent width along the full run. Any existing landscaping, edging, or irrigation within the footprint is removed or relocated.
Excavation begins with a compact excavator (mini-excavator or skid steer), removing the topsoil and native clay to the specified depth. On most residential projects in Uxbridge, where the native soil is predominantly a silty clay glacial till, we excavate to a minimum of 12 inches below finished grade. The excavated soil is loaded into dump trailers and hauled off-site. It is not stockpiled on the property and reused, because clay soil retains water and is the cause of frost heave.
Phase 2: Geotextile and Sub-Base
Non-woven geotextile fabric is draped over the excavated surface, extending 6 inches up all edges. This prevents clay migration into the granular base.
The sub-base material—Granular A or clear stone, selected based on the site drainage assessment—is installed in compacted lifts. A minimum of two lifts for a 10-inch base, three lifts for a 14-inch base. Each lift is compacted with a heavy vibratory plate compactor to 95% Standard Proctor Density. The surface of the finished sub-base is laser-checked for grade uniformity and for the required 2% cross-slope falling away from the driveway.
Phase 3: Edge Restraint and Bedding
For paver installations, a heavy-duty polymer or concrete edge restraint is installed along the outer edge of the walkway (the side facing the lawn). The driveway side receives a flexible restraint that accommodates the thermal joint between the two surfaces.
A 25mm (1-inch) setting bed of HPB (High-Performance Bedding)—a 6mm angular washed limestone chip—is screeded to a uniform thickness using guide rails and a screed bar. The setting bed provides a precise, level surface for paver placement and acts as an additional drainage layer.
Phase 4: Surface Installation
Pavers are installed in the specified pattern, cut precisely to fit against the driveway edge with a wet-saw diamond blade. Joint sand—premium polymeric or high-performance jointing sand that hardens after activation—is swept into the joints, compacted with a plate compactor (with a protective neoprene pad to prevent surface marring), and activated with water per the manufacturer's instructions. The polymeric sand locks the pavers together, prevents weed growth in the joints, and resists washout from rain and snowmelt.
For poured concrete installations, the formwork is set to the exact elevation and grade, rebar or wire mesh is placed on chairs at the correct depth, and the concrete is poured, vibrated, screeded, and finished in a single continuous operation. Control joints are cut every 6 to 8 feet to manage shrinkage cracking. The fresh concrete is covered with curing blankets for a minimum of 7 days to ensure proper hydration and strength development.
The Cinintiriks Approach: Seamless Integration
At Cinintiriks, we do not pour cheap, floating slabs. We engineer flawless structural extensions in Uxbridge and across the GTA, meticulously managing sub-base drainage and seamlessly integrating premium luxury hardscaping that looks like it was built with the original estate, not tacked on as an amateur afterthought. Our Cinintiriks Standard for Driveway Extensions covers every critical detail:
1. Pre-Construction Survey: We evaluate the existing driveway's material, age, base depth (where accessible), drainage patterns, and current frost performance. If the existing driveway is already experiencing heave or settlement, we address that condition first—building a new walkway alongside a failing driveway is structurally pointless.
2. Engineered Sub-Base Parity: The walkway sub-base is designed to match or exceed the depth and drainage performance of the existing driveway base. We never install a walkway on a shallower base than the structure it sits beside. If the driveway sits on 12 inches of Granular A, the walkway sits on a minimum of 12 inches of Granular A. Parity is non-negotiable.
3. Joint Engineering: For concrete-to-concrete extensions, we dowel with structural epoxy and #4 rebar at 12-inch centres. For paver-to-asphalt or paver-to-concrete, we install a flexible joint with polymeric edge restraint and matching sealant. Every joint is designed for the specific material combination and frost exposure of the site.
4. Drainage Management: Every walkway is graded with a minimum 2% cross-slope away from the driveway. Where the existing property grading does not support this slope, we install a concealed slot drain or French drain along the walkway-driveway interface to collect and redirect water before it can accumulate in the joint.
5. Material Specification: We install through-mix integral colour, CSA A231.2 certified interlocking pavers at a minimum thickness of 60mm for pedestrian walkways and 80mm for areas that may support occasional vehicle traffic. The pavers are set on HPB bedding, locked with premium polymeric joint sand, and restrained with concrete or heavy-duty polymer edge restraint anchored with 10-inch galvanised spikes at 12-inch centres.
Don't ruin your driveway with a cracked, separating walkway. Contact Cinintiriks for a heavily engineered, seamlessly integrated hardscape extension in Uxbridge.
FAQ: Walkway Installation Alongside a Driveway
Do I need to drill steel rebar into my existing driveway to attach a new concrete walkway?
Only if both surfaces are poured concrete and you want them to behave as a single monolithic structure. Doweling—drilling into the edge of the existing slab and inserting epoxy-anchored rebar that extends into the new pour—is the strongest method for preventing differential movement at the joint. It forces the two slabs to heave and settle together rather than independently, which eliminates the gap-and-lip failure that destroys most walkway-to-driveway joints within a few winters. However, doweling requires specific conditions: the existing slab must be thick enough (minimum 4 inches, ideally 5 or more) to achieve proper rebar embedment depth. If the slab is too thin, the dowel will simply crack out of the concrete under frost load. The drill holes must be cleaned of dust (compressed air), and the rebar must be bonded with structural-grade anchoring epoxy, not construction adhesive or polyurethane sealant. If your existing driveway is asphalt, doweling is not applicable —asphalt cannot hold a rigid steel connection. In that case, the proper approach is an isolation joint with flexible sealant, or better yet, a segmental paver walkway that does not require any mechanical connection to the driveway at all. The paver system is inherently flexible and manages differential movement through its segmental design rather than through a rigid bond.
Will adding a concrete path tightly against an asphalt driveway cause the asphalt to crack in winter?
It can, and it frequently does when the joint is not designed correctly. The issue is thermal incompatibility. Asphalt and concrete expand and contract at different rates. Asphalt is a flexible pavement that deforms gradually under load and temperature change. Concrete is rigid—it does not deform, it cracks. If you pour concrete directly against the edge of an asphalt driveway with no joint material between them, the concrete will press against the asphalt during hot-weather expansion, and the asphalt will yield—it will bulge, crack, or compress along the contact edge. In cold weather, the concrete contracts and pulls away, opening a gap that fills with water and debris. The cycle repeats, and within a few winters the asphalt edge is crumbling, cracked, and delaminating alongside the concrete. The solution is simple but non-negotiable: never pour concrete directly against asphalt without an isolation joint. A 10mm to 12mm closed-cell polyethylene foam expansion strip must be placed between the two surfaces before the concrete is poured. This foam absorbs the expansion and contraction movement, preventing the two materials from grinding against each other. The surface is then sealed with a flexible polyurethane joint sealant rated for the full Ontario temperature range. Alternatively —and this is the approach we recommend at Cinintiriks—use interlocking pavers for the walkway instead of poured concrete. Pavers do not exert continuous lateral pressure against the driveway edge the way a rigid concrete slab does. The individual paver units and the polymeric sand joints absorb thermal movement internally, eliminating the rigid-against-flexible conflict entirely.
Is it better to use interlocking pavers instead of poured concrete for a driveway extension in Ontario?
In almost every case, yes. The advantages are structural, aesthetic, and financial over the long term. Structurally: Pavers are segmental. Each unit moves independently, absorbing frost heave through micro-adjustment rather than cracking. A paver walkway alongside a driveway does not require rebar doweling, destructive drilling into the existing surface, or a rigid joint that must be maintained annually. If any section heaves beyond acceptable tolerance after an unusually severe winter, individual pavers can be lifted, the base re-levelled, and the pavers relaid —restoring the surface to perfect grade without demolition or new material. Aesthetically: A paver walkway introduces colour, texture, and architectural definition that poured concrete simply cannot match. A Warm Off-White paver field with a Charcoal soldier course border transforms a plain driveway frontage into a designed, luxurious approach. It communicates intentionality and investment in a way that a grey concrete slab never will. Financially: The upfront cost of a quality paver installation is 15-30% higher than poured concrete. However, the lifecycle cost is lower because pavers do not crack, do not require joint repair, and can be individually replaced if damaged. A poured concrete walkway that cracks and separates from the driveway within 3-5 years requires either expensive patching (which fails again) or complete demolition and replacement—at which point the total cost exceeds the paver option by a significant margin. For a driveway extension in Ontario's freeze-thaw climate, pavers are not only the premium choice—they are the practical choice.
The Final Word
A walkway alongside your driveway is not a simple pour. It is a structural extension of an existing system, and it must be engineered with the same rigour as the original driveway itself. The sub-base must match. The joint must be designed for the specific materials involved. The drainage must be redirected, not trapped. And the surface material must be chosen not just for how it looks in week one, but for how it will perform in winter fifteen.
Get the engineering right, and the walkway looks like it has always been there—a seamless, permanent extension of the property's hardscape. Get it wrong, and you have got a cracking, heaving, separating eyesore that announces itself to every visitor who walks up to your door.
We know which outcome we prefer. And we build exclusively for that one.