The truth that most property owners in the Greater Toronto Area never hear—until the damage has already been done—is that mulch, topsoil, and decorative stone are surface water management materials. Every square metre of material you place on your property is either directing water away from your foundation and root zones, or it is trapping water against them. There is no neutral outcome. The material is either engineered to perform, or it is working against you.
This guide details the most catastrophic mistakes we encounter— repeatedly, across Aurora and the broader GTA—and explains exactly why they fail and what the correct approach looks like. These are not minor aesthetic quibbles. These are failures that rot house foundations, kill mature trees worth thousands of dollars, create permanent weed infestations, and turn luxury planting beds into swamp-like drainage nightmares that cost more to repair than the original installation.
The Surface Management Illusion
Walk through any residential neighbourhood in Aurora on a spring afternoon and you will see it everywhere: fresh mulch piled high against tree trunks, topsoil dumped over rough grades with no attention to drainage slope, and decorative river rock dropped directly onto bare clay soil without a scrap of fabric beneath it. It all looks beautiful on Saturday morning. And it all begins failing before the first heavy rain.
The illusion is that these materials are cosmetic. You are “dressing up” the garden beds. You are “freshening up” the yard. The reality is that you are building the most critical layer of your property’s drainage system. Topsoil is not dirt—it is graded fill that must pitch surface water at a minimum 2% slope away from your foundation walls. Mulch is not decoration—it is a moisture regulation blanket that must sit at precise depths to insulate root zones without suffocating bark tissue. Decorative stone is not a coverall—it is a heavy aggregate that will physically sink into any unprotected substrate and create a perfect weed germination medium in the process.
When these materials are applied by someone who treats them as cosmetic afterthoughts, the results are predictable. And expensive.
Mistake 1: The Mulch Volcano & Foundation Rot
This is the single most common and most damaging landscaping mistake in the GTA, and it is performed every spring by thousands of well- meaning homeowners and, regrettably, by a significant number of landscaping companies who ought to know better.
The Tree Killer: Mulch Piled Against Trunk Flare
The “mulch volcano” is exactly what it sounds like: a cone-shaped mound of mulch piled 15–30 cm deep directly against the trunk of a tree, tapering outward like a miniature volcano. It is the default mulch technique of every untrained landscaper and every homeowner who has never been told otherwise. And it kills trees.
Here is the biology: the trunk flare—the widened base where the trunk transitions into the root system— is designed by nature to be exposed to air. The bark tissue at the trunk flare is fundamentally different from root tissue. It is not waterproof. It is not designed to be buried. When mulch is piled against the trunk flare, it holds moisture directly against the bark for weeks and months at a time. The bark tissue softens, becomes waterlogged, and begins to decompose. Fungal pathogens— species like Phytophthora, Armillaria, and various Fusarium species that thrive in constantly moist organic material—colonise the softened bark and begin attacking the cambium layer beneath it.
The cambium is the tree’s circulatory system. It is a single- cell-thick layer of living tissue that transports water and nutrients between the roots and the canopy. Once fungal infection girdles even a portion of the cambium, that section of the tree’s vascular system is permanently destroyed. The canopy above the damaged section begins to thin, yellow, and die back. Because the damage is happening underground, hidden beneath the mulch, most homeowners do not notice anything is wrong until the canopy damage is advanced and irreversible.
A mature caliper tree in Aurora—a 30 cm diameter sugar maple, a heritage-sized red oak, a specimen ornamental that the homeowner has watched grow for 15 years—can be worth $5,000 to $25,000 in replacement value, not including the decades of growth time that cannot be purchased. We have seen mulch volcanoes kill trees of this calibre. The homeowner was trying to help the tree by mulching generously. Instead, they smothered it.
“The trunk flare breathes. Bury it, and you are suffocating the tree’s circulatory system. We have seen $20,000 maples killed by a $40 load of mulch applied incorrectly.”
The correct technique is a mulch donut, not a mulch volcano. Mulch is spread in an even layer, 50–75 mm (2–3 inches) deep, in a ring around the tree. The inner edge of the ring must sit 10–15 cm back from the trunk flare, leaving bare soil or a very thin scattering of mulch immediately around the base. The trunk flare remains fully exposed to air and light. Moisture drains away from the trunk rather than pooling against it.
The Foundation Killer: Material Above Weep Holes
The second dimension of this mistake is equally destructive, but directed at the house rather than the trees. And it happens just as frequently.
Every brick-clad home built in Ontario has weep holes —small, intentionally unsealed gaps in the mortar joints of the lowest course of brickwork, typically positioned 30–40 cm above the finished grade level. These gaps are not construction defects. They are a critical part of the wall’s moisture management system. The brick veneer is not waterproof—it is designed to absorb rainwater, allow it to run down the back face of the brick (inside the air gap between the brick and the sheathing), and drain out through the weep holes at the bottom. It is a gravity-driven drainage system that only works if the weep holes are clear and above grade.
When a homeowner or landscaper piles mulch, topsoil, or decorative stone above the level of the weep holes, several things happen in rapid sequence:
- Moisture is trapped. Water that should be draining out through the weep holes is now blocked by the material piled against them. The moisture backs up inside the wall cavity, saturating the sheathing, the vapour barrier, and eventually the insulation and interior drywall
- Efflorescence and staining. Mineral deposits begin appearing on the interior face of the brickwork as trapped moisture forces calcium salts outward through the mortar. Externally, the brick above the buried zone develops a permanently damp, discoloured appearance
- Pest entry. Carpenter ants, termites (yes, they exist in Ontario), earwigs, and other moisture-seeking insects use the wet mulch as a direct bridge from the soil into the wall cavity. We have inspected properties in Aurora where carpenter ant colonies had established satellite nests inside the wall framing, directly behind a mulch bed that was piled 20 cm above the weep holes. The mulch was literally a highway from the soil into the house
- Structural rot. In advanced cases, the sustained moisture leads to rot in the bottom plate of the wall framing, the rim joist, and the floor sheathing. This is not cosmetic damage. This is structural failure of the building envelope, and the repair cost ranges from $10,000 for localised remediation to $50,000+ for extensive wall rebuilds that require the brick veneer to be stripped and rebuilt from the damaged zone upward
The rule is simple and non-negotiable: no material— mulch, topsoil, stone, nothing—may be placed higher than 150 mm (6 inches) below the bottom of the weep holes. On most Ontario homes, this means the finished grade of any landscaping material must sit a minimum of 200 mm (8 inches) below the bottom edge of the brickwork. If your current beds are built up to or above the weep line, the material must be excavated back down before any new mulch or topsoil is applied. Piling fresh material on top of a problem does not solve it—it accelerates it.
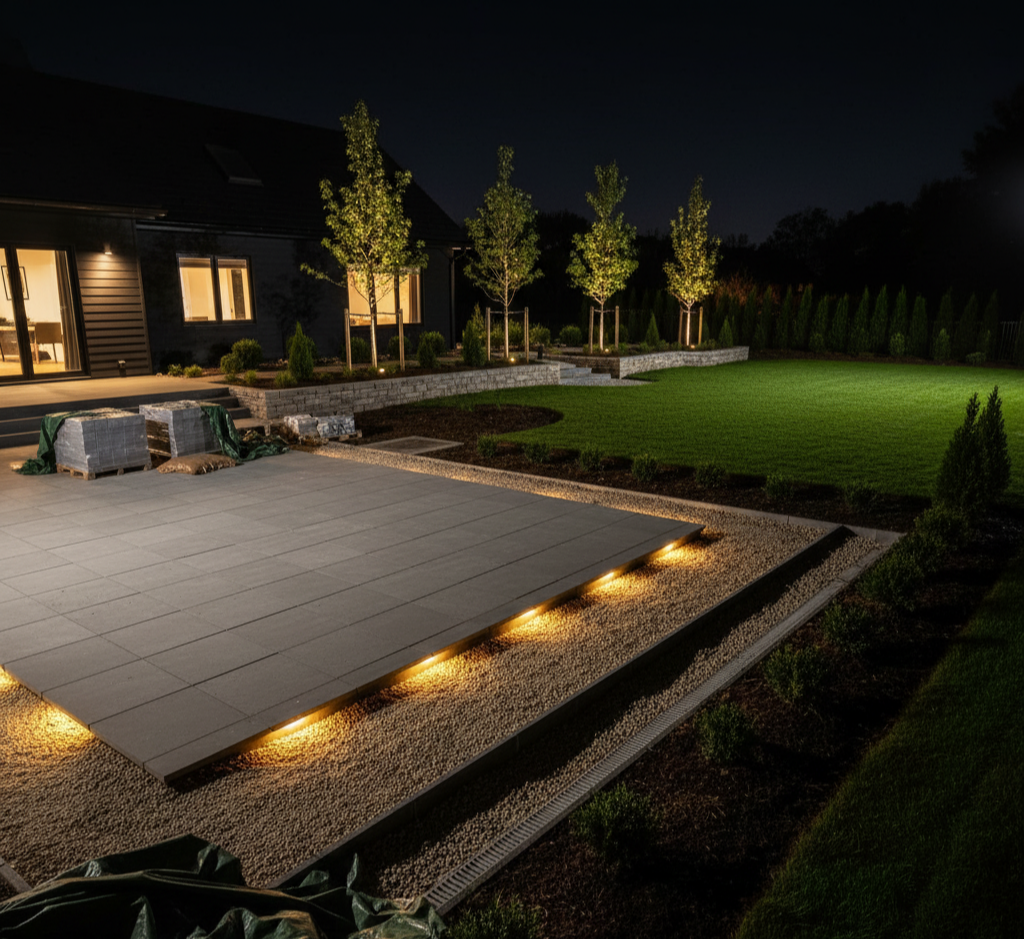
Mistake 2: Stone Without Geotextile—The Sinking Swamp
Decorative stone—river rock, clear stone, limestone screenings, architectural boulders—is one of the most visually striking materials in a luxury landscape. A properly executed stone bed around the perimeter of an Aurora estate home, through a naturalized garden, or along commercial property frontages communicates permanence, taste, and low maintenance. It is a material that should last decades.
And it will last decades—if the substrate beneath it is properly prepared. If it is not, the stone bed will look pristine for exactly one season. By the following spring, the problems begin. And by year three, the installation is a full-scale failure that requires complete removal and reinstallation.
The Physics of Sinking Stone
Decorative stone is heavy. A 50 mm (2 inch) layer of river rock weighs approximately 80–100 kg per square metre. That mass is concentrated on a relatively small surface area (the contact points of the individual stones against the soil). When this mass sits on bare, unprotected soil—particularly the clay-heavy soils prevalent across most of Aurora, Newmarket, and York Region—the stones do not sit on the surface. They sink into it.
The process is accelerated dramatically during rain events. Ontario receives an average of 830 mm of precipitation annually, distributed across approximately 130 rain days. During every rain event, water saturates the soil beneath the stone bed. The clay softens. The bearing capacity drops. The heavy stones settle deeper into the softened substrate. When the soil dries out again, it re-consolidates around the stones, locking them in place at their new, lower elevation. With each rain cycle, the stones migrate a few more millimetres downward.
Within two to three years, a stone bed laid directly on bare soil will exhibit the full range of failure symptoms:
- Visible mud between stones. As the stones sink, the soil rises around them. The clean, crisp look of stone-on- stone disappears, replaced by a muddy, embedded appearance that no amount of raking can fix because the stones are now in the soil, not on it
- Aggressive weed growth. The soil between and around the sunken stones is now exposed to light and moisture— ideal germination conditions. Weed seeds (which are always present in the soil, in concentrations of thousands per square metre) sprout through every gap. Because the roots are growing directly in the surrounding soil, they are deeply anchored and nearly impossible to pull without disturbing the stone. Within a single growing season, a once-pristine stone bed becomes a weed-infested mess that the homeowner spends every weekend fighting
- Drainage failure. The original purpose of the stone bed—whether decorative drainage, perimeter dressing, or bed definition—is compromised as the stones become embedded in impermeable clay rather than sitting freely on a draining surface. Water pools on top of the stone bed instead of percolating through it
The Engineered Solution: Excavate, Fabric, Place
The correct installation of any decorative stone bed is a three-phase process, and the most critical phase is the one that happens before a single stone is placed:
Phase 1: Excavation. The existing soil must be excavated to a depth of 100–150 mm (4–6 inches) below the intended finished grade of the stone surface. This excavation serves two purposes: it creates a basin for the stone to sit in (preventing lateral migration), and it removes the weed-seed-laden topsoil layer that would otherwise serve as a germination bed directly beneath the stone.
Phase 2: Geotextile fabric. A commercial- grade woven geotextile fabric—not the flimsy, translucent “landscape fabric” sold in rolls at garden centres, but a heavy-duty, UV-stabilised, woven polypropylene fabric with a minimum weight of 110–140 g/m² —is laid across the entire excavated basin. The fabric edges overlap by a minimum of 150 mm (6 inches) at every seam. The fabric is pinned to the soil with galvanised landscape staples at 300 mm (12 inch) intervals along every edge and seam.
This fabric is the structural separator between the stone and the soil. It performs three critical functions:
- Prevents sinking. The fabric distributes the mass of the stone across its entire surface area rather than allowing point-loading at individual stone contact points. The stone sits on the fabric, which sits on the soil. The fabric bridges the soft zones and prevents differential settlement
- Blocks weed germination. Seeds that land on the stone surface cannot push roots through the fabric into the soil. Seeds in the soil beneath the fabric cannot push shoots upward through it. The weed lifecycle is physically interrupted at the fabric layer. Occasional weeds will sprout in organic debris that accumulates on top of the stone over time, but these are surface-rooted and pull out effortlessly because they have no anchor in the underlying soil
- Allows drainage. Woven geotextile is permeable—water passes through it freely while soil particles do not. Rainwater percolates down through the stone, through the fabric, and into the soil below, preventing surface ponding. The soil beneath the fabric remains stable because water drains through uniformly rather than concentrating at stone-contact pressure points
Phase 3: Stone placement. The decorative stone is placed on top of the geotextile to a depth of 50–75 mm (2–3 inches). This depth is sufficient to fully conceal the fabric, provide visual density, and suppress any light penetration that might encourage algae growth on the fabric surface. Depths greater than 100 mm are unnecessary for most residential applications and waste material.
This three-phase process takes approximately 30–40% longer than the dump-and-spread method. But the result lasts 10–15 years before any significant maintenance is required, versus the dump-and-spread installation that begins failing within 18 months. The labour and material cost of doing it right the first time is a fraction of the cost of removing, excavating, and reinstalling a failed stone bed.
Mistake 3: Ungraded Topsoil—The Silent Flood
This is the quiet disaster. It does not announce itself the way a mulch volcano or a weedy stone bed does. It builds slowly, over months and years, as water migrates in directions it was never supposed to go.
When topsoil is delivered and spread without any attention to final grade elevation and drainage slope, the result is almost always one of two failure modes:
Negative Grade: Water Running Toward the Foundation
The Ontario Building Code requires a minimum 2% grade slope away from foundation walls for the first 1.8 metres (6 feet) of surrounding grade. This means that for every metre of horizontal distance from your house, the soil surface must drop at least 20 mm. Over 1.8 metres, that is a minimum drop of 36 mm (approximately 1.5 inches).
This sounds trivial. And it is trivial to achieve with a laser level and a competent operator. But when topsoil is dumped by the truckload and spread by hand or by an unskilled operator on a skid steer, the final grade is whatever the soil happens to settle into. Flat spots develop. Depressions form near the foundation where foot traffic during construction compacted the soil. And the result is negative grading—areas where water runs toward the house instead of away from it.
Over time, negative grading saturates the soil against the foundation wall. The waterproofing membrane (which, on homes built before the 2006 OBC update, may be nothing more than a single coat of damp-proofing rather than a true waterproof membrane) becomes the only barrier between the saturated soil and your basement. And damp-proofing fails. It cracks. It deteriorates. And once it fails, the water is inside your basement—seeping through the concrete, wicking up the drywall, and creating the ideal conditions for mould growth that can make interior spaces uninhabitable.
We inspect properties across Aurora where the homeowner has spent $15,000–$30,000 on interior waterproofing—weeping tile replacement, sump pump installation, crack injection—while the actual cause of the water intrusion was 50 mm of negative grade in the topsoil within six feet of the foundation. A $2,000 grading correction would have eliminated the problem entirely. But nobody looked at the grade. They looked at the water in the basement and assumed the solution was inside the house.
Zero Grade: The Permanent Puddle
Even where the grade is not actively negative (running toward the house), a flat or near-flat grade creates chronic pooling problems throughout the property. Every slight depression, every settled area, every low spot where the topsoil was spread unevenly becomes a permanent puddle zone after every rain event.
For luxury plantings—the Japanese maples, ornamental grasses, specimen evergreens, and perennial beds that our Aurora clients invest thousands in—standing water is lethal. The root systems of most ornamental plantings are designed for well-drained soil. They require oxygen exchange in the root zone. When water sits on the surface for more than 24– 48 hours after a rain event, the soil pore spaces fill completely with water, displacing oxygen. Root cells begin dying within days. Fungal root rot (Phytophthora, Pythium) colonises the stressed root tissue. And the plant slowly declines over the course of a single season, showing progressive yellowing, wilting, and dieback that the homeowner typically attributes to “disease” or “winter damage” rather than the actual cause: the topsoil was never graded properly, and the plant has been slowly drowning since the day it was installed.
The Cinintiriks Approach: Heavy Civil Discipline for Soft Landscaping
At Cinintiriks, we do not distinguish between “hard” and “soft” landscaping when it comes to engineering standards. Mulch, topsoil, and decorative stone receive the same methodical, heavily documented treatment that we apply to our concrete pours, our interlock installations, and our structural retaining walls. This is The Cinintiriks Standard, and it is non-negotiable across every project we execute, whether it is a single residential bed refresh or a full commercial property renovation.
1. Laser-Graded Topsoil: Every topsoil installation on a Cinintiriks project is graded using a rotary laser level with elevation stakes set at 1.5-metre intervals across the entire grading area. We do not eyeball grade. We do not rely on “experienced judgement.” We shoot elevations, set datum points, and machine-grade the topsoil to guarantee a minimum 2% positive drainage slope away from every foundation wall, retaining wall, and structure on your Aurora property. The final grade is verified with a second laser pass before any seed, sod, or planting is placed. If the grade does not meet specification, we re-grade. There are no assumptions. There are measurements.
2. Commercial-Grade Geotextile Under All Stone: We do not install decorative stone on bare soil. Ever. Regardless of the project scope—a 5 m² accent bed or a 500 m² commercial perimeter—every square metre of decorative stone sits on a minimum 110 g/m² woven geotextile fabric with lapped seams and pinned edges. The substrate is excavated, compacted with a plate tamper, covered with fabric, and then dressed with stone. This process adds 45 minutes of labour per 10 m². It also eliminates the weed infestation and sinking-stone failure that defines every unprotected stone installation within 18 months.
3. Precision Mulch Depths with Foundation Clearance: All mulch on Cinintiriks projects is applied at a uniform 50–75 mm (2–3 inch) depth, verified with a depth gauge at multiple points across each bed. The mulch is pulled back 10–15 cm from every trunk flare and 150 mm minimum below every weep hole on the building envelope. Our crews are trained to identify weep hole locations on every project before a single bag of mulch is opened. This is not optional. It is standard operating procedure.
4. Material Selection: We specify natural, untreated, double-shredded hardwood bark mulch for all residential and commercial applications. We do not install dyed mulch (the dye can leach into soil and affect pH), rubber mulch (which does not decompose, does not contribute to soil biology, and overheats in summer sun), or raw wood chips (which rob nitrogen from the soil as they decompose, starving the very plants they are supposed to protect). The topsoil we supply is a certified, screened blend with documented organic content, pH range, and particle-size distribution. It is not “fill from a farmer’s field.” It is an engineered growing medium.
Don’t let amateur landscaping rot your foundation or drown your plants. Contact Cinintiriks for heavily engineered, flawlessly executed property enhancements in Aurora and across the Greater Toronto Area.
FAQ: Mulch, Topsoil & Decorative Stone
Why do weeds still grow in my decorative river rock?
This is the number-one frustration we hear from property owners who have invested in decorative stone beds, and the answer is almost always the same: there is no geotextile fabric beneath the stone, or the fabric that was installed is the wrong type. If the stone was placed directly on bare soil, the weeds are growing from the existing seed bank in the soil beneath the rock. Every square metre of typical Ontario topsoil contains thousands of dormant weed seeds waiting for light and moisture to trigger germination. Bare soil beneath stone provides both. Even where a fabric was installed, if the product was a thin, non-woven “landscape fabric” from a garden centre (typically 50–70 g/m²), it will degrade under UV exposure within 2–3 seasons and begin tearing, allowing weed roots to penetrate directly into the soil. The solution is a commercial-grade woven geotextile (110–140 g/m² minimum) that is UV-stabilised for 15+ year ground-contact life. Additionally, some weeds you see in stone beds are not actually rooted in the soil—they are rooted in the thin layer of organic debris (decomposed leaves, windblown soil, pollen silt) that accumulates on top of the stone over several years. These surface-rooted weeds pull out effortlessly because they have no deep soil anchor. An annual clearing of accumulated organic debris from the stone surface, combined with a properly installed geotextile beneath, will reduce weed occurrence in a stone bed by 90–95%.
How thick should mulch be applied around luxury commercial plantings?
The optimal mulch depth for commercial planting beds is 50–75 mm (2–3 inches) of natural hardwood bark mulch. This depth is sufficient to suppress weed germination (by blocking light to the soil surface), regulate soil moisture (by reducing evaporation during summer heat and insulating against freeze-thaw cycling in winter), and moderate soil temperature extremes that stress root systems. Depths less than 50 mm are insufficient for weed suppression—sunlight penetrates the thin layer and allows germination beneath it. Depths greater than 100 mm (4 inches) are actively harmful: the thick mulch layer restricts oxygen exchange to the root zone, traps excessive moisture against the soil surface, and creates anaerobic conditions at the soil-mulch interface that promote root rot. On commercial properties in the GTA, where planting beds may contain specimen trees, caliper shrubs, and perennial masses valued at $10,000–$50,000 per bed, the mulch depth is not a cosmetic decision—it is a plant health specification that directly affects the survival and performance of the planting investment. We apply mulch at measured depths and pull it back from every trunk flare on every plant in every bed. This takes more time than the industry- standard dump-and-spread approach. It also keeps the plants alive.
Can I just dump new topsoil over my existing grass to fix a low spot?
No. This is one of the most common DIY fixes we see, and it fails for several reasons. First, if you dump more than 25 mm (1 inch) of topsoil over existing grass, the grass beneath will smother and die. The blades cannot photosynthesize through the soil layer, and the crown of the grass plant (where new growth originates) is buried. The result is a dead patch covered by fresh soil that will not grow anything until it is reseeded. Second, even if you apply a thin layer that the grass can grow through, you have not addressed the reason the low spot exists. Low spots in established lawns are typically caused by one of three things: (1) settlement of poorly compacted fill beneath the topsoil (common in homes built within the last 10 years where the builder backfilled with uncompacted material), (2) organic decomposition of buried debris (tree stumps, construction waste, excess mulch from a previous installation), or (3) subsurface erosion from a failed weeping tile, broken downspout extension, or underground water migration path. Adding topsoil on top of any of these underlying conditions only masks the symptom temporarily. The low spot will return as the underlying cause continues to settle or erode. The correct approach is to diagnose the cause, correct the subsurface condition (compact the fill, remove the buried debris, repair the drainage failure), re-grade the area with laser-verified elevations to match the surrounding lawn, and re-sod or re-seed the corrected zone. On an Aurora property with heavy clay subsoil, this is especially critical—clay does not drain freely, and any depression in the grade will hold water indefinitely, creating a chronic wet spot that kills grass and breeds mosquitoes.
The Final Word
Mulch, topsoil, and decorative stone are not finishing touches. They are the surface layer of your property’s drainage, moisture management, and biological health system. Applied correctly, they protect your foundation, prolong the life of your plantings, suppress weeds permanently, and give your property a clean, maintained appearance that lasts for years between refreshes.
Applied incorrectly—mulch piled against trunks and foundations, stone dumped on bare soil, topsoil spread without any attention to grade—they become the most expensive mistakes on your property. The tree you lose to trunk rot. The foundation repair you need because moisture breached the weep line. The stone bed you rip out and reinstall because it sank into the mud. The planting bed you replant every spring because the drainage was never right.
Every one of these failures is preventable. Every one of them costs more to repair than it would have cost to execute correctly the first time. And every one of them starts with the same root cause: treating surface materials as cosmetic rather than structural.
At Cinintiriks, we do not make that distinction. If it touches the ground, it is engineered.